Getting Started with ROS Kinetic and PX4 on Ubuntu 16.04
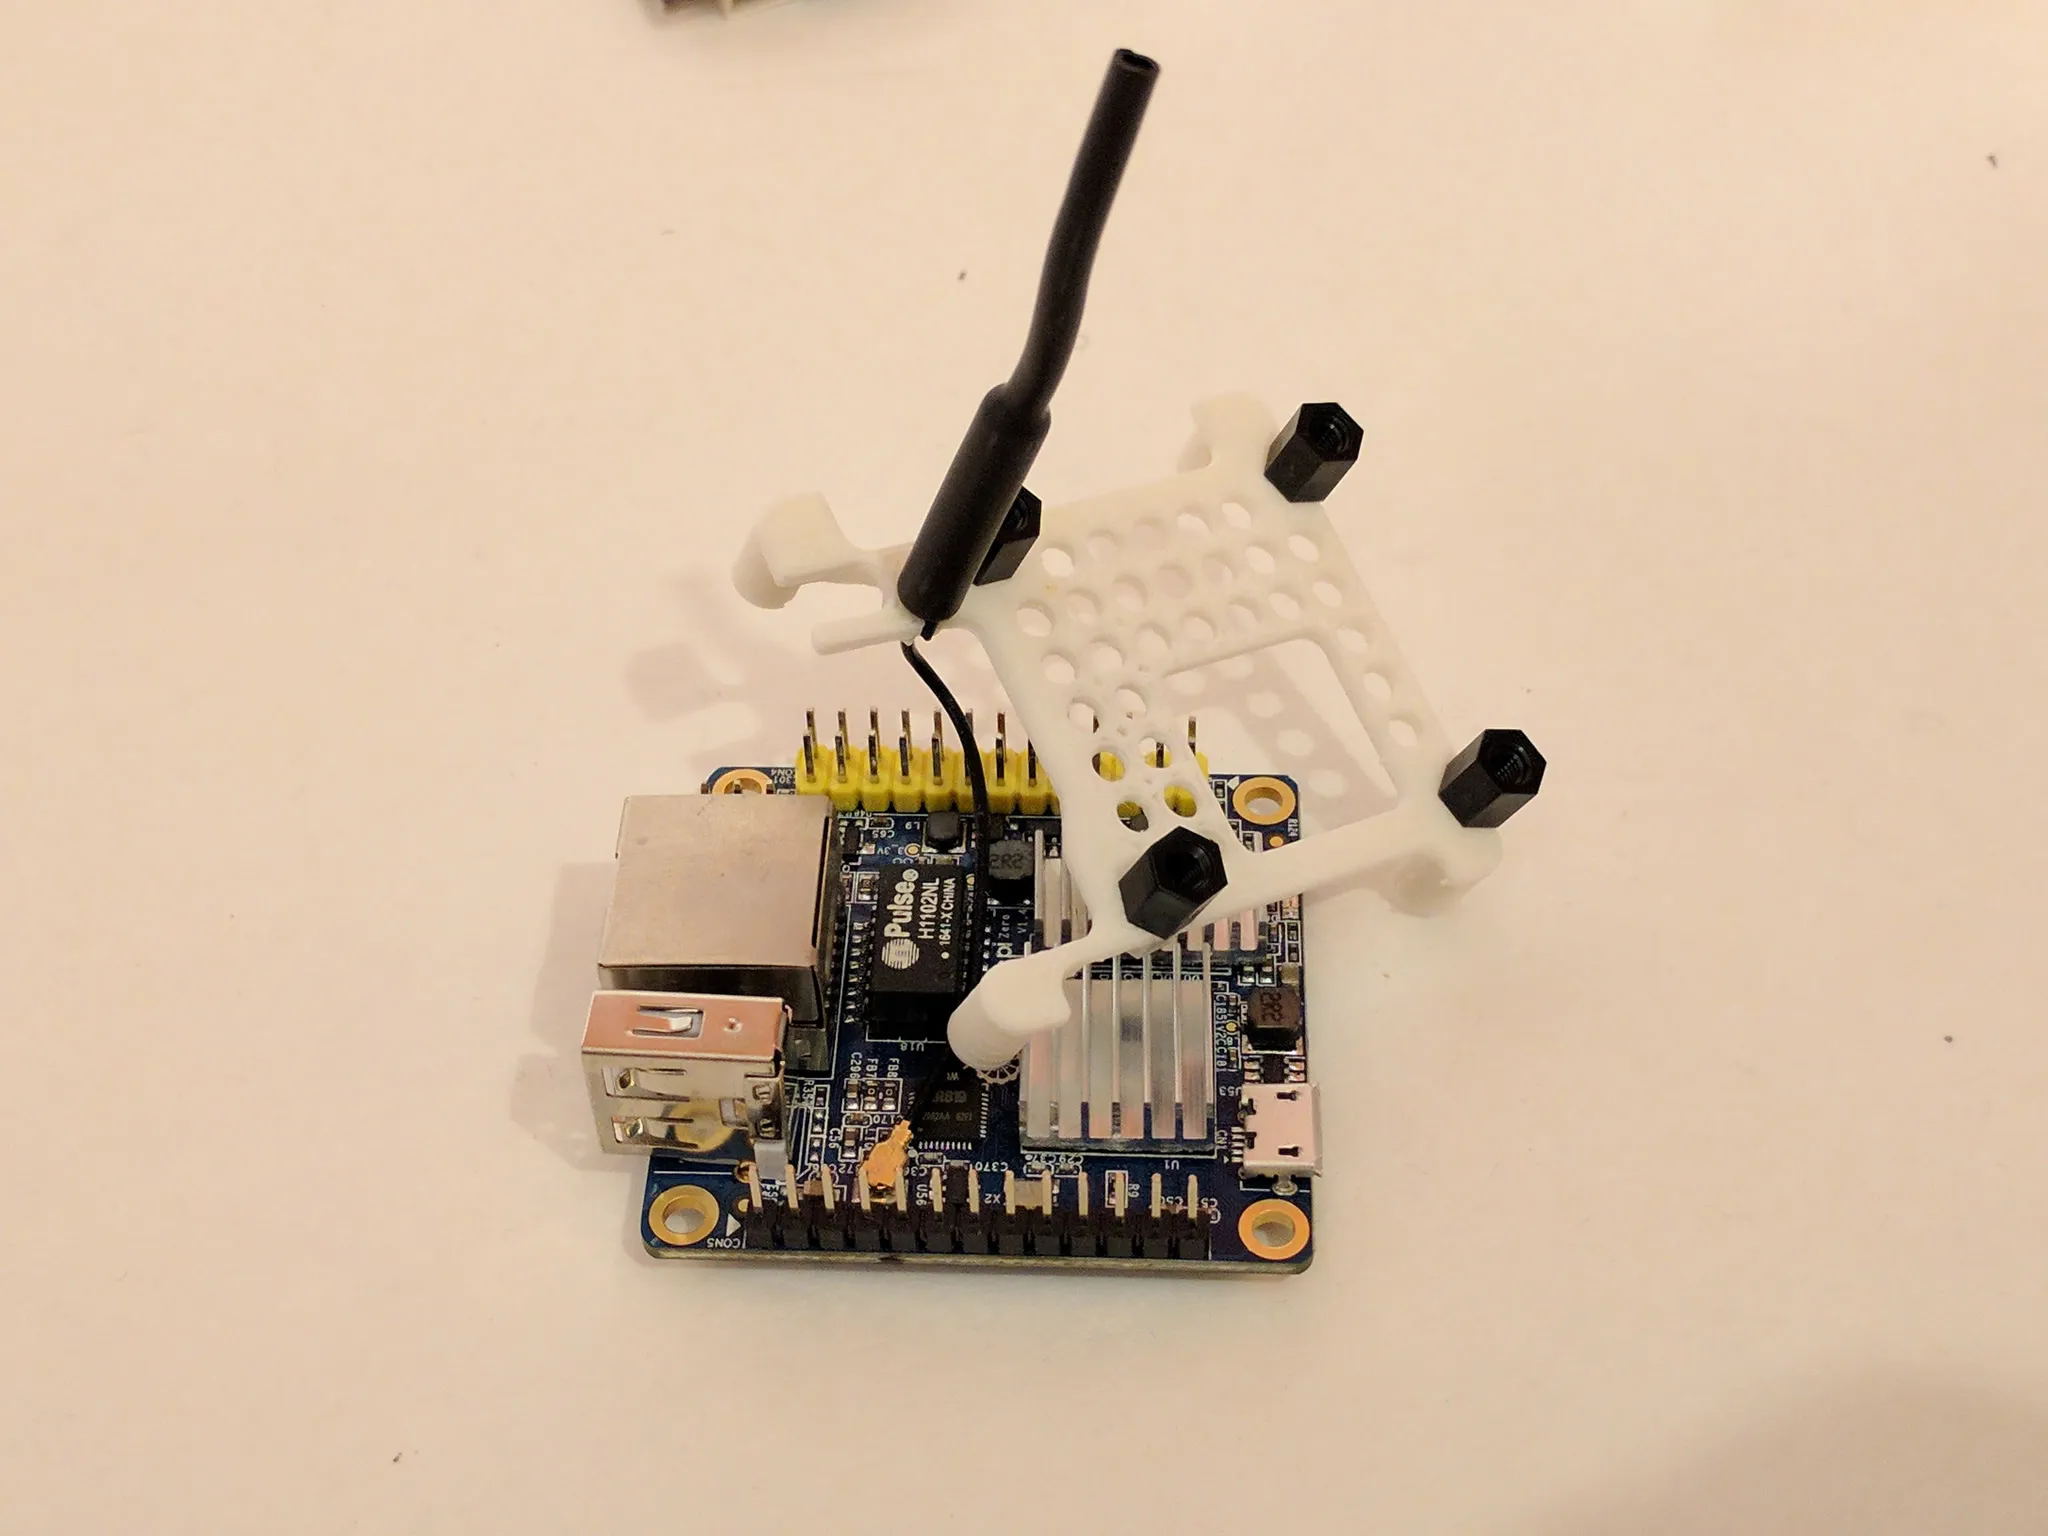
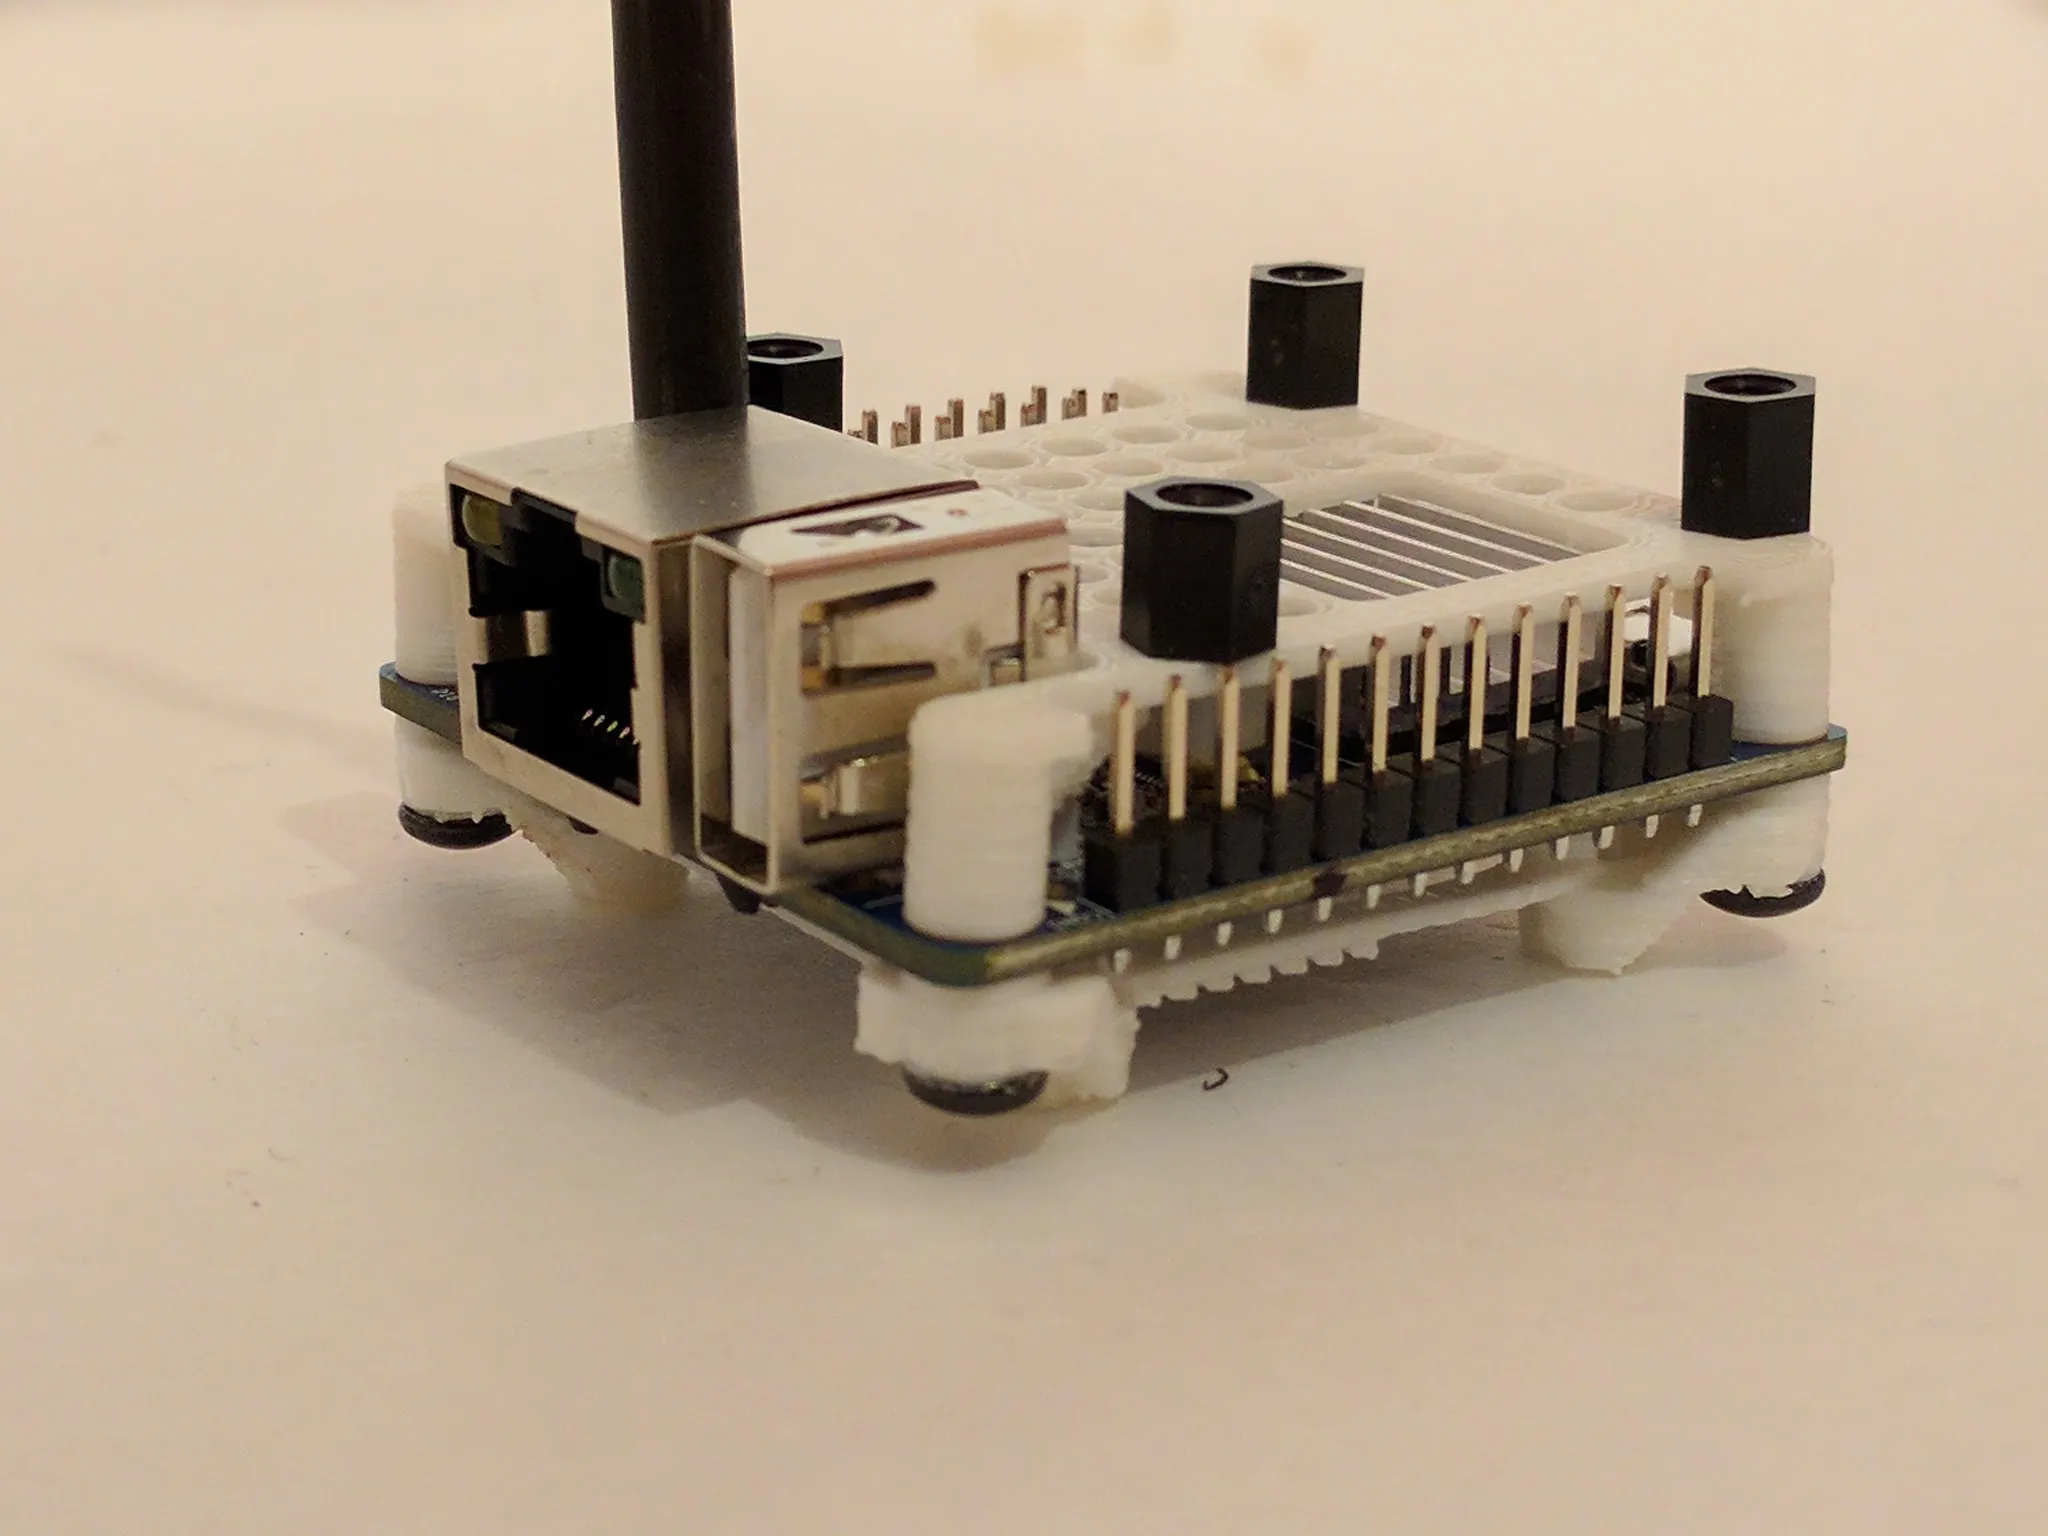
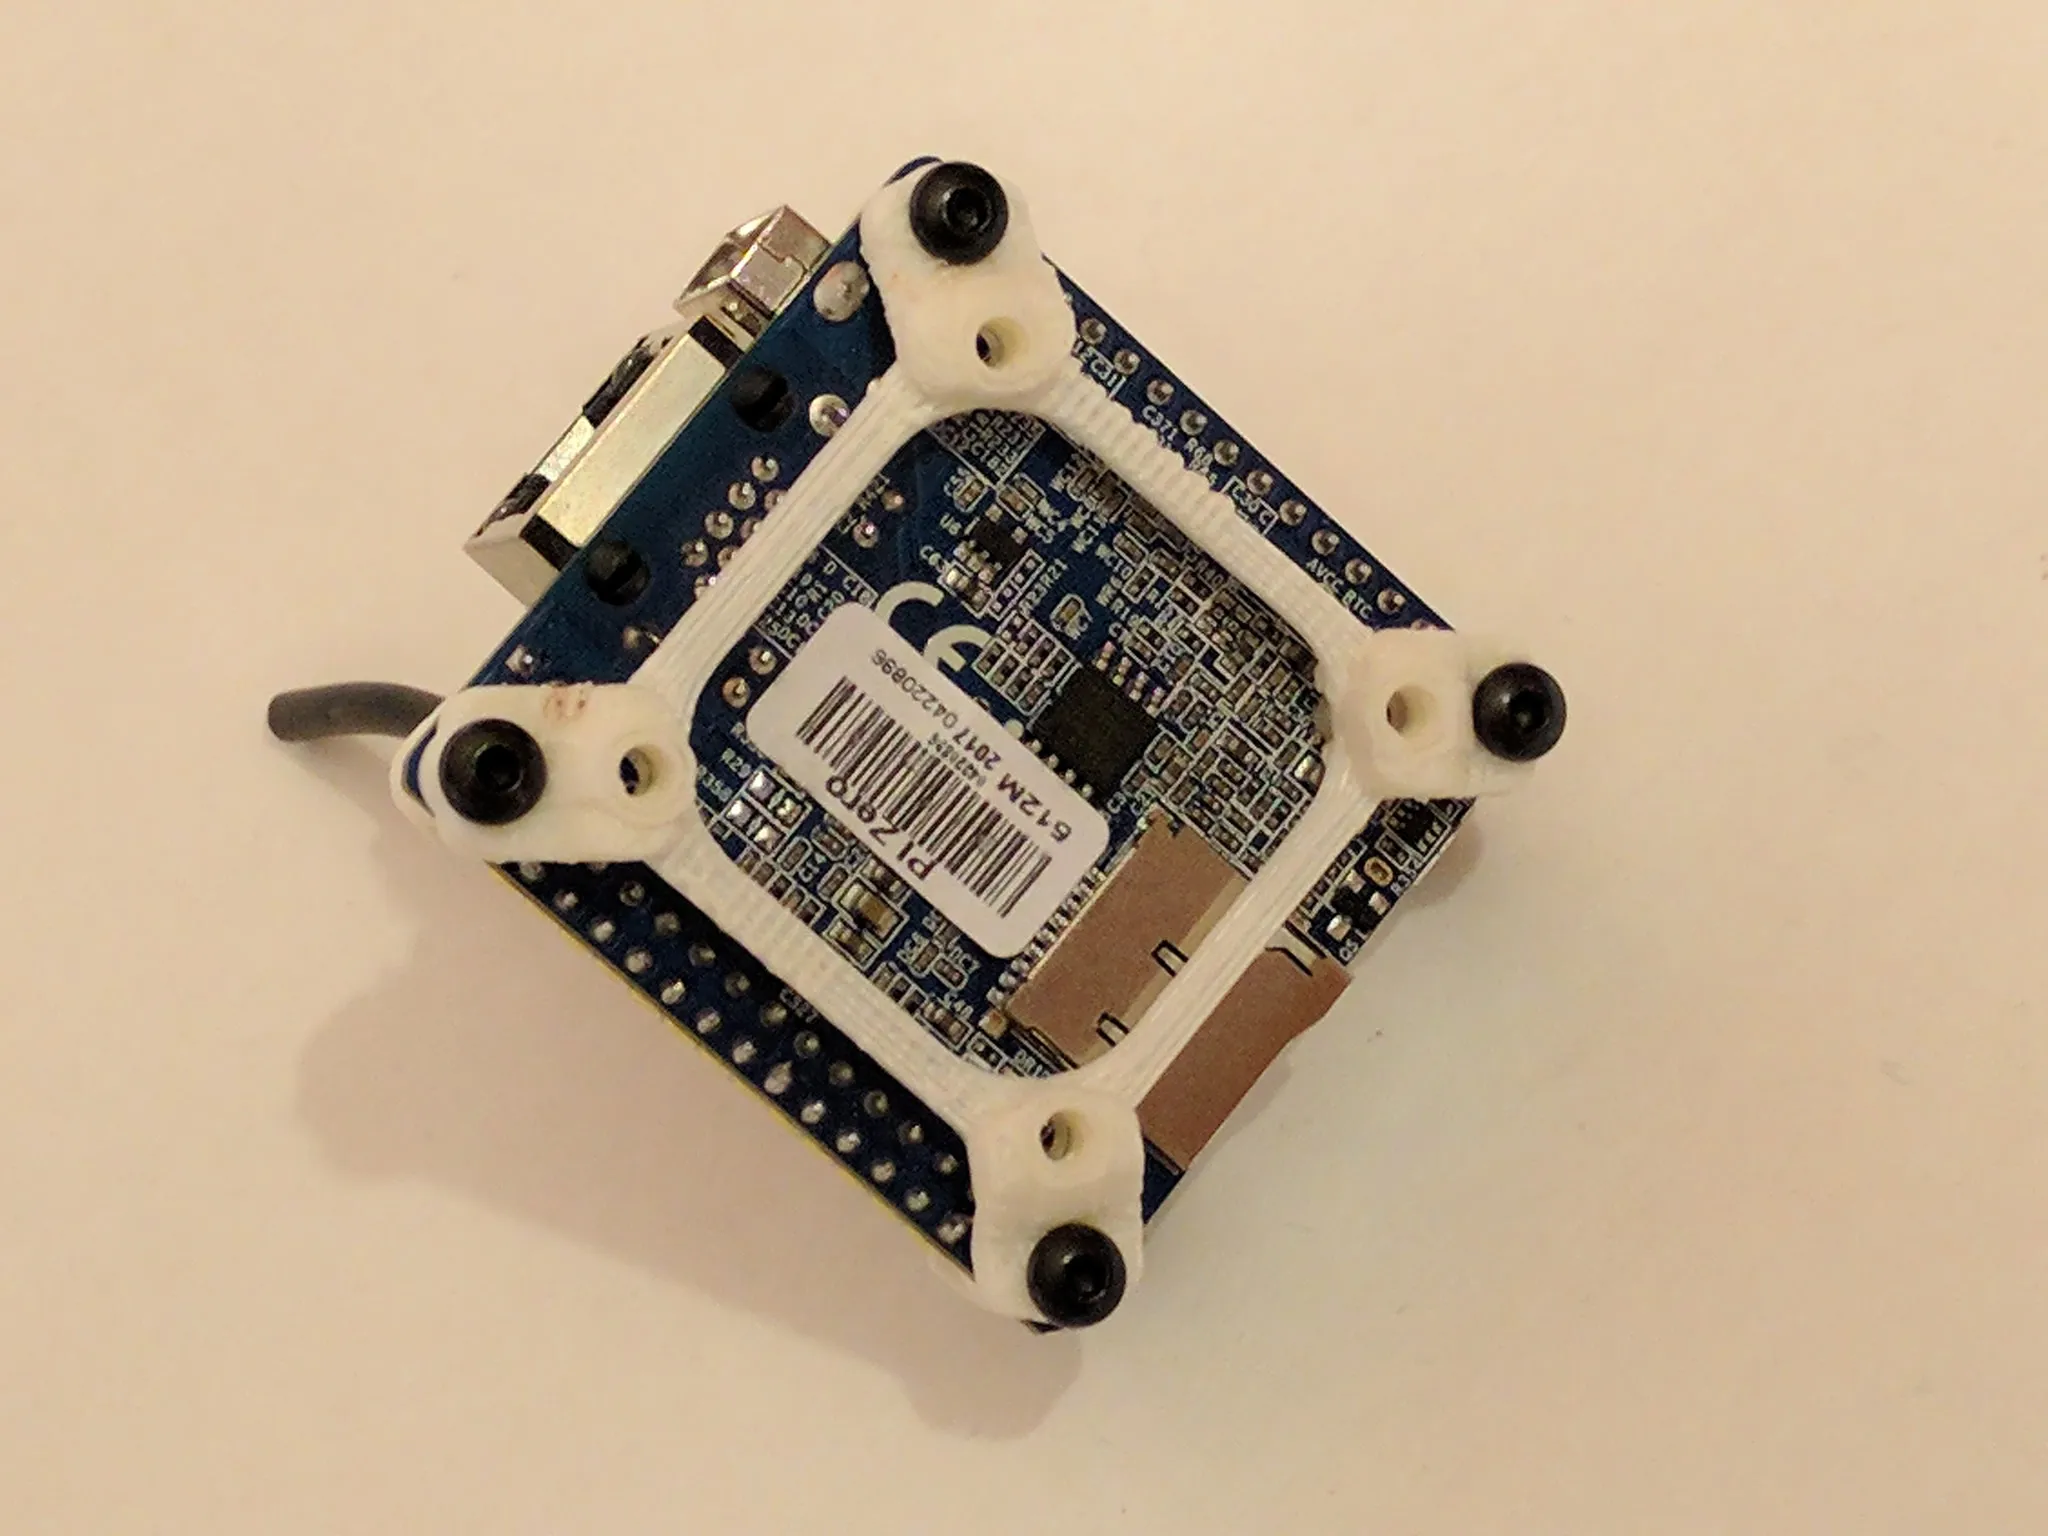
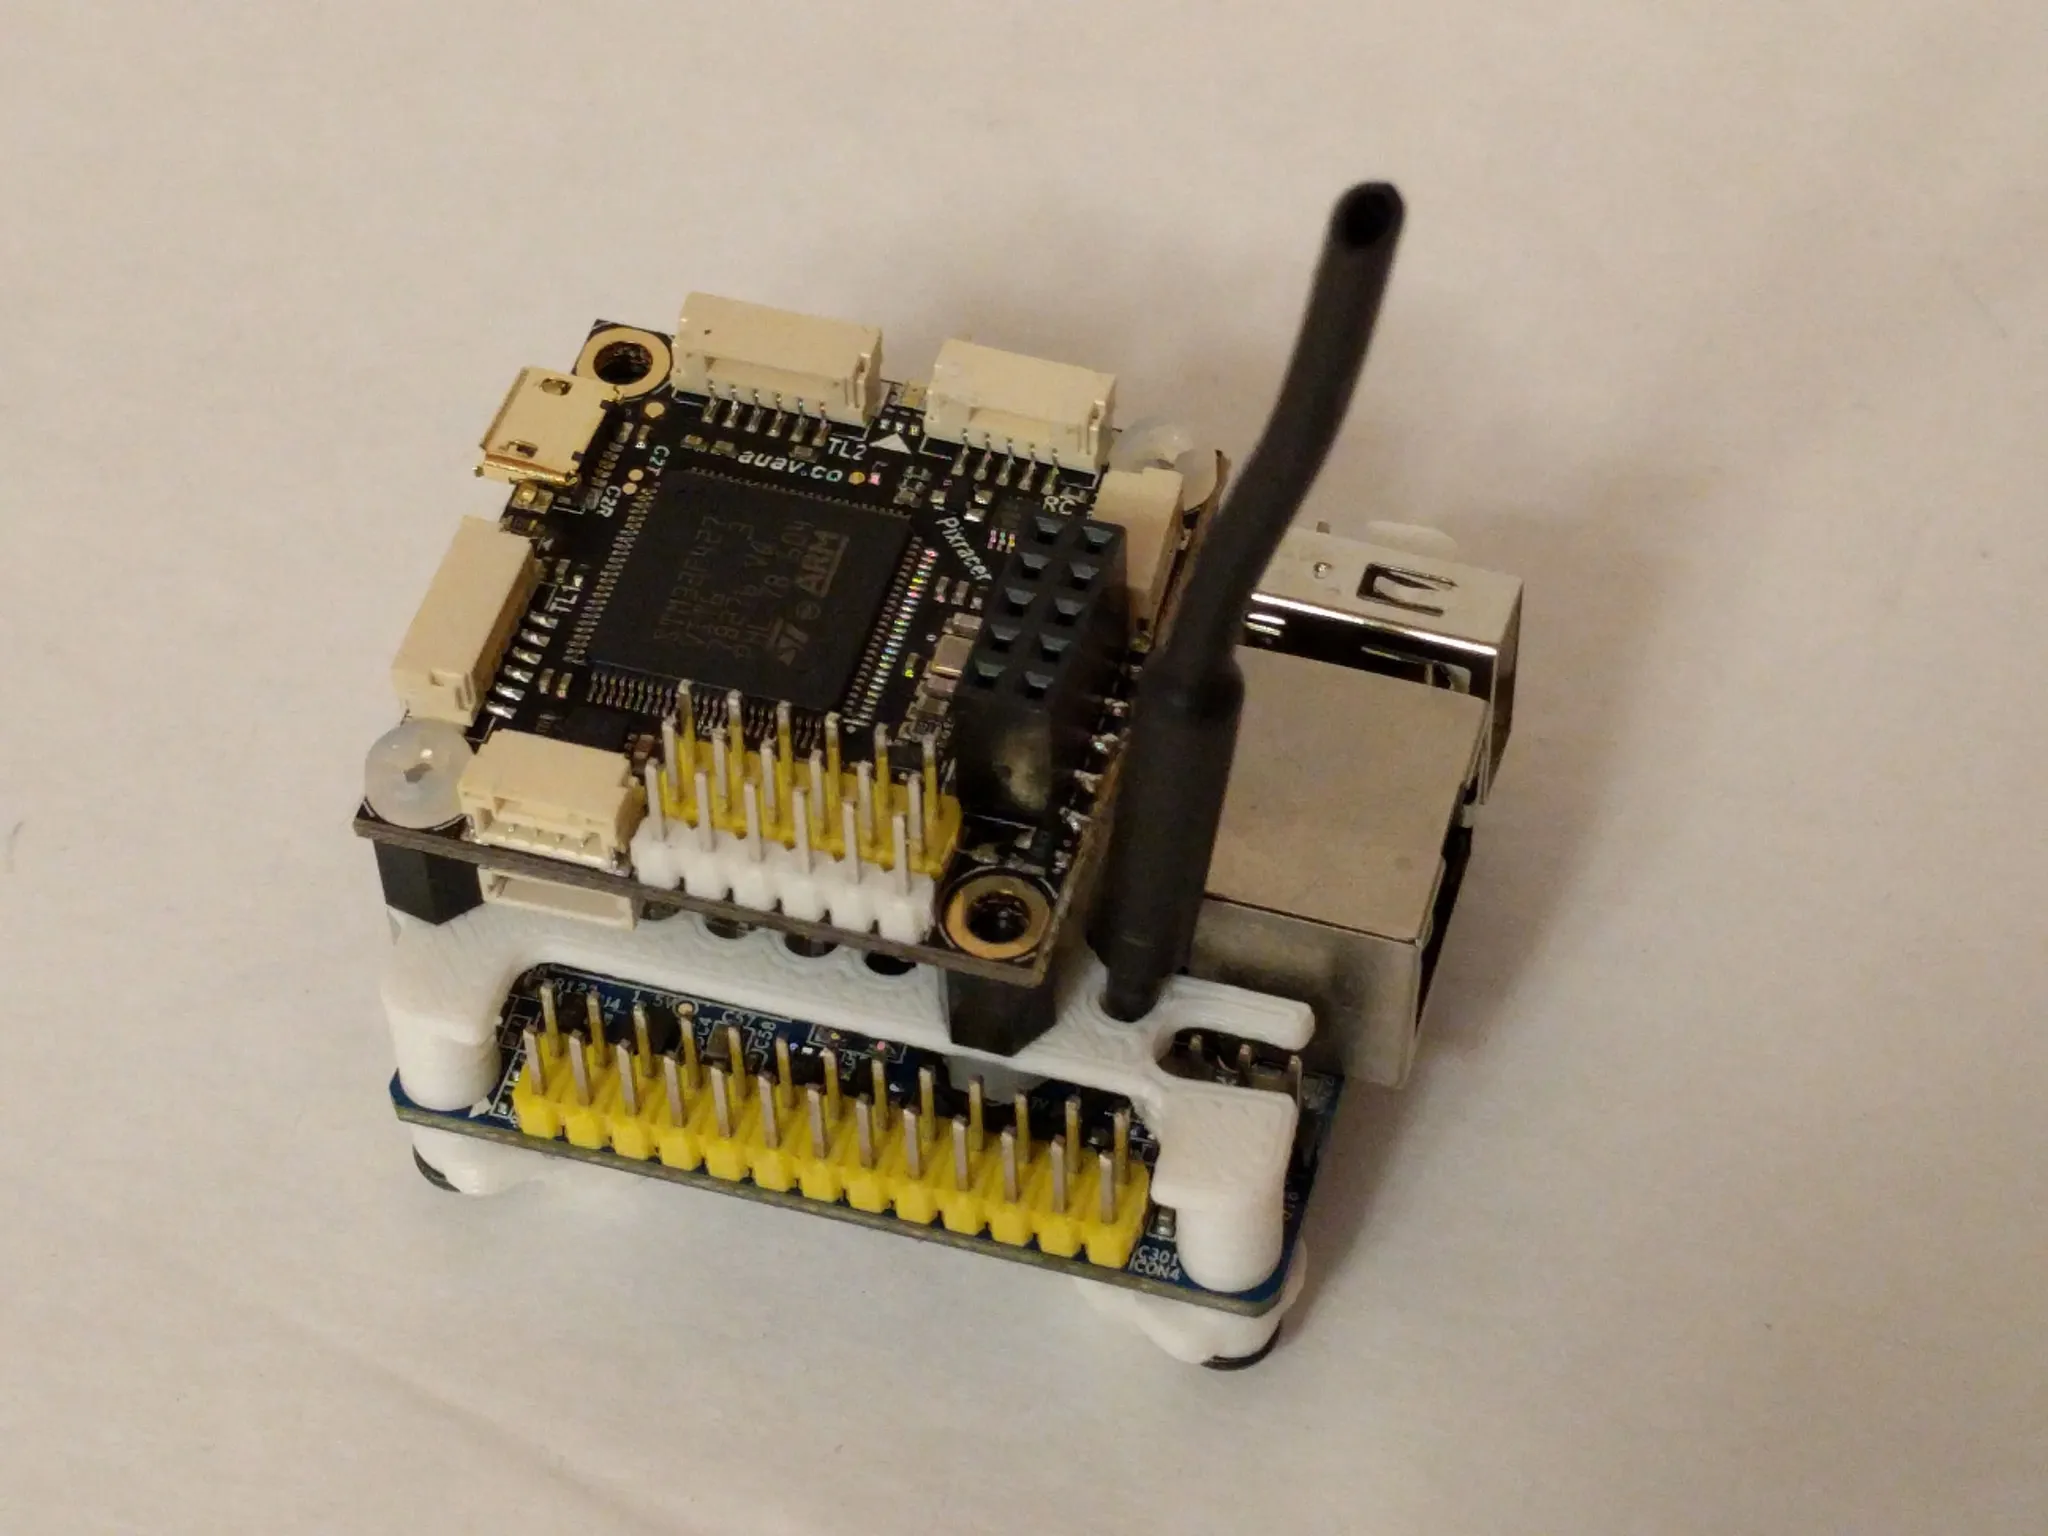
I’m starting to experiment with PX4 off-board control. These are my setup notes. First, a photo of the awesome hardware setup. The Pixracer is mounted on top of an Orange Pi.
Software Setup
I’m using an Ubuntu 16.04 VM on my Mac. I set the network interface to “shared” and SSH into the VM. In the SSH session, I run tmux.
Ubuntu and SSH
Install Ubuntu 16.04 in a VM and use apt-get to install VMware tools, vim, tmux, SSH server, and other dependencies:
sudo apt-get install -y open-vm-tools-desktop vim tmux ssh cmake zsh curlOn the VM, copy your key into mkdir ~/.ssh && vim ~/.ssh/authorized_keys.
You’ll need to set the permissions:
chmod 700 ~/.ssh
chmod 644 ~/.ssh/authorized_keys
Open the VM settings, network tab, hit advanced, and copy the MAC address.
Follow the directions to give your VM a static IP by editing: /Library/Preferences/VMware\ Fusion/vmnet8/dhcpd.conf
Be sure to put the snippet after the “DO NOT MODIFY SECTION”, and remove spaces in the host name:
####### VMNET DHCP Configuration. End of "DO NOT MODIFY SECTION" #######
host Ubuntu16.0464-bit{
    hardware ethernet 00:0C:29:8F:2B:45;
    fixed-address 172.16.38.110;
}
Quit VMware Fusion and restart.
In the VM, get a new IP with:
sudo dhclient -r
sudo dhclient
Add the IP to the ~/.ssh/config file on the host:
Host ubuntu16
  HostName 172.16.38.110
Now you can run ssh ubuntu16.
Build PX4
PX4 Dev Setup
sudo usermod -a -G dialout $USERLogout and log back in, then run the installer; this will take a while:
source <(curl -s [https://raw.githubusercontent.com/PX4/Devguide/master/build_scripts/ubuntu_sim_ros_gazebo.sh](https://raw.githubusercontent.com/PX4/Devguide/master/build_scripts/ubuntu_sim_ros_gazebo.sh))Restart your VM: sudo shutdown -r now
cd into the firmware directory:
cd ~/src/FirmwareCheck out a stable release and submodules:
git checkout tags/v1.6.5 -b tag-v1.6.5
git submodule sync --recursive && git submodule update --init --recursive
When running in the VM, limit to OpenGL2 with:
export SVGA_VGPU10=0Build PX4 and run Gazebo:
make posix_sitl_default gazeboInstall Gazebo
Gazebo is a 3D simulation environment.
Version information is here: http://gazebosim.org/tutorials?tut=ros_wrapper_versions&cat=connect_ros. We’ll be upgrading from version 2 (included with Kinetic) to version 7 (required by PX4).
Add the osrfoundation ppa:
sudo sh -c 'echo "deb [http://packages.osrfoundation.org/gazebo/ubuntu-stable](http://packages.osrfoundation.org/gazebo/ubuntu-stable) `lsb_release -cs` main" > /etc/apt/sources.list.d/gazebo-stable.list'
wget [http://packages.osrfoundation.org/gazebo.key](http://packages.osrfoundation.org/gazebo.key) -O - | sudo apt-key add -
Install version 7:
sudo apt-get update
sudo apt-get remove -y ros-kinetic-gazebo-ros-pkgs ros-kinetic-gazebo-ros-control
sudo apt-get install -y gazebo7 ros-kinetic-gazebo7-ros-pkgs ros-kinetic-gazebo7-ros-control
To test Gazebo, run a roscore and start Gazebo. You’ll need to run gazebo_ros in the VM so it can connect to X11. Source your env first, if you haven’t already:
source devel/source.zsh
rosrun gazebo_ros gazebo
If you get an error message like this VMware: vmw_ioctl_command error Invalid argument, try using OpenGL2 with:
SVGA_VGPU10=0 rosrun gazebo_ros gazeboPX4 Setup
Let’s get the flight controller connected and configured.
Docs and Software
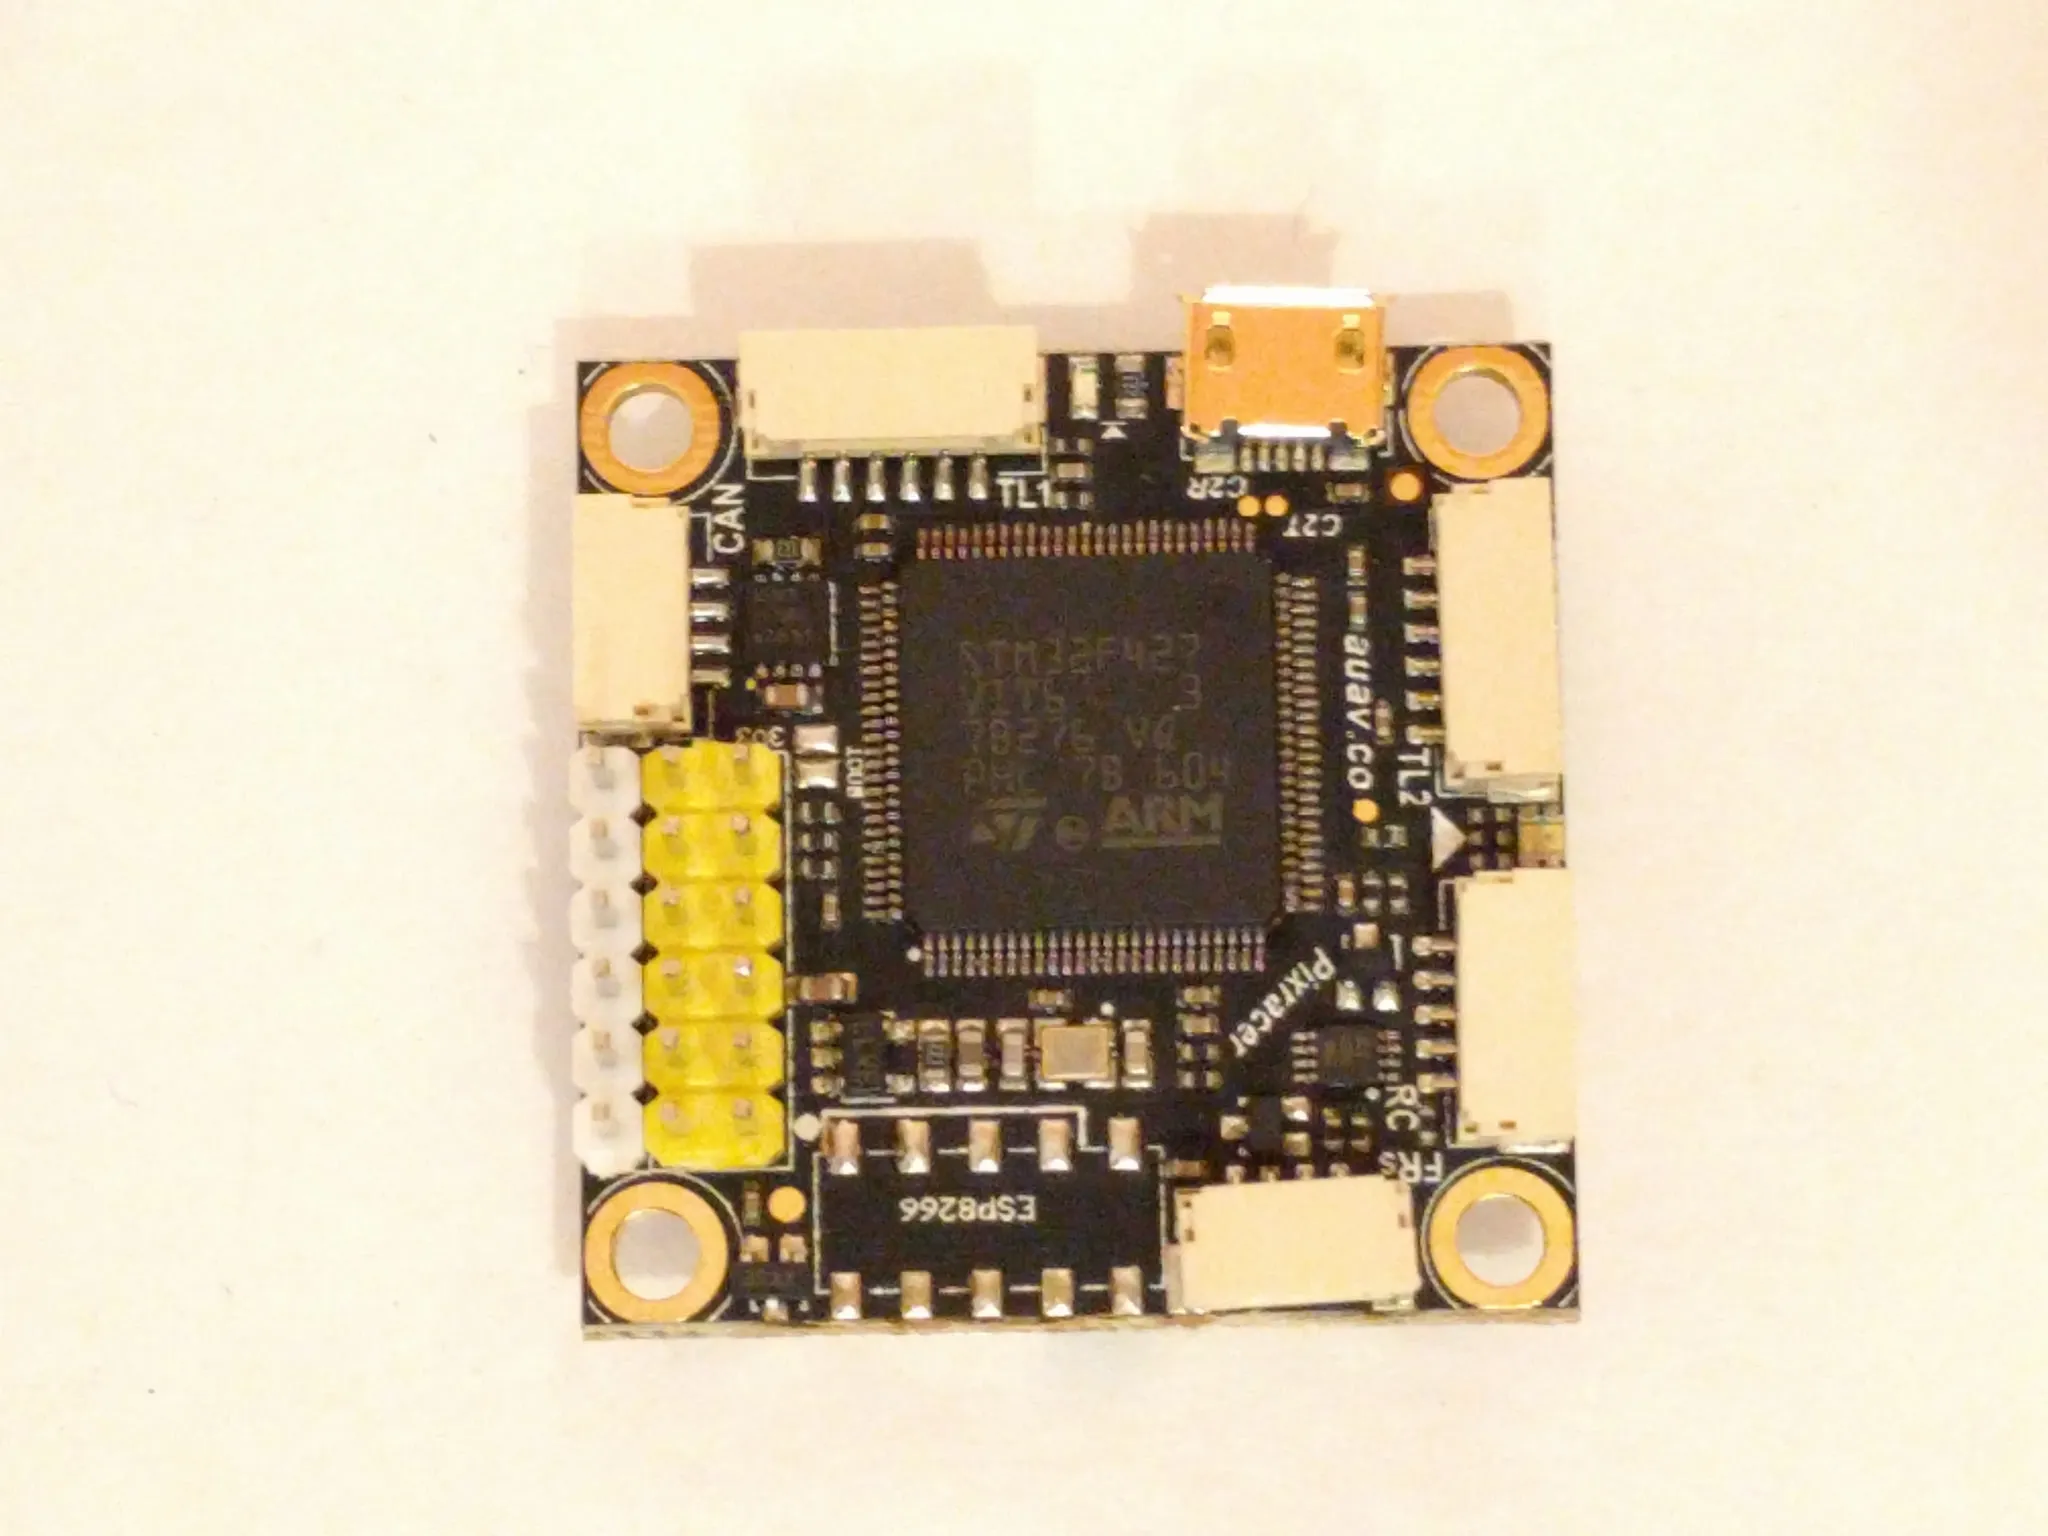
Here’s the Pixracer documentation.
Download and install QGroundControl.
Update Pixracer Firmware
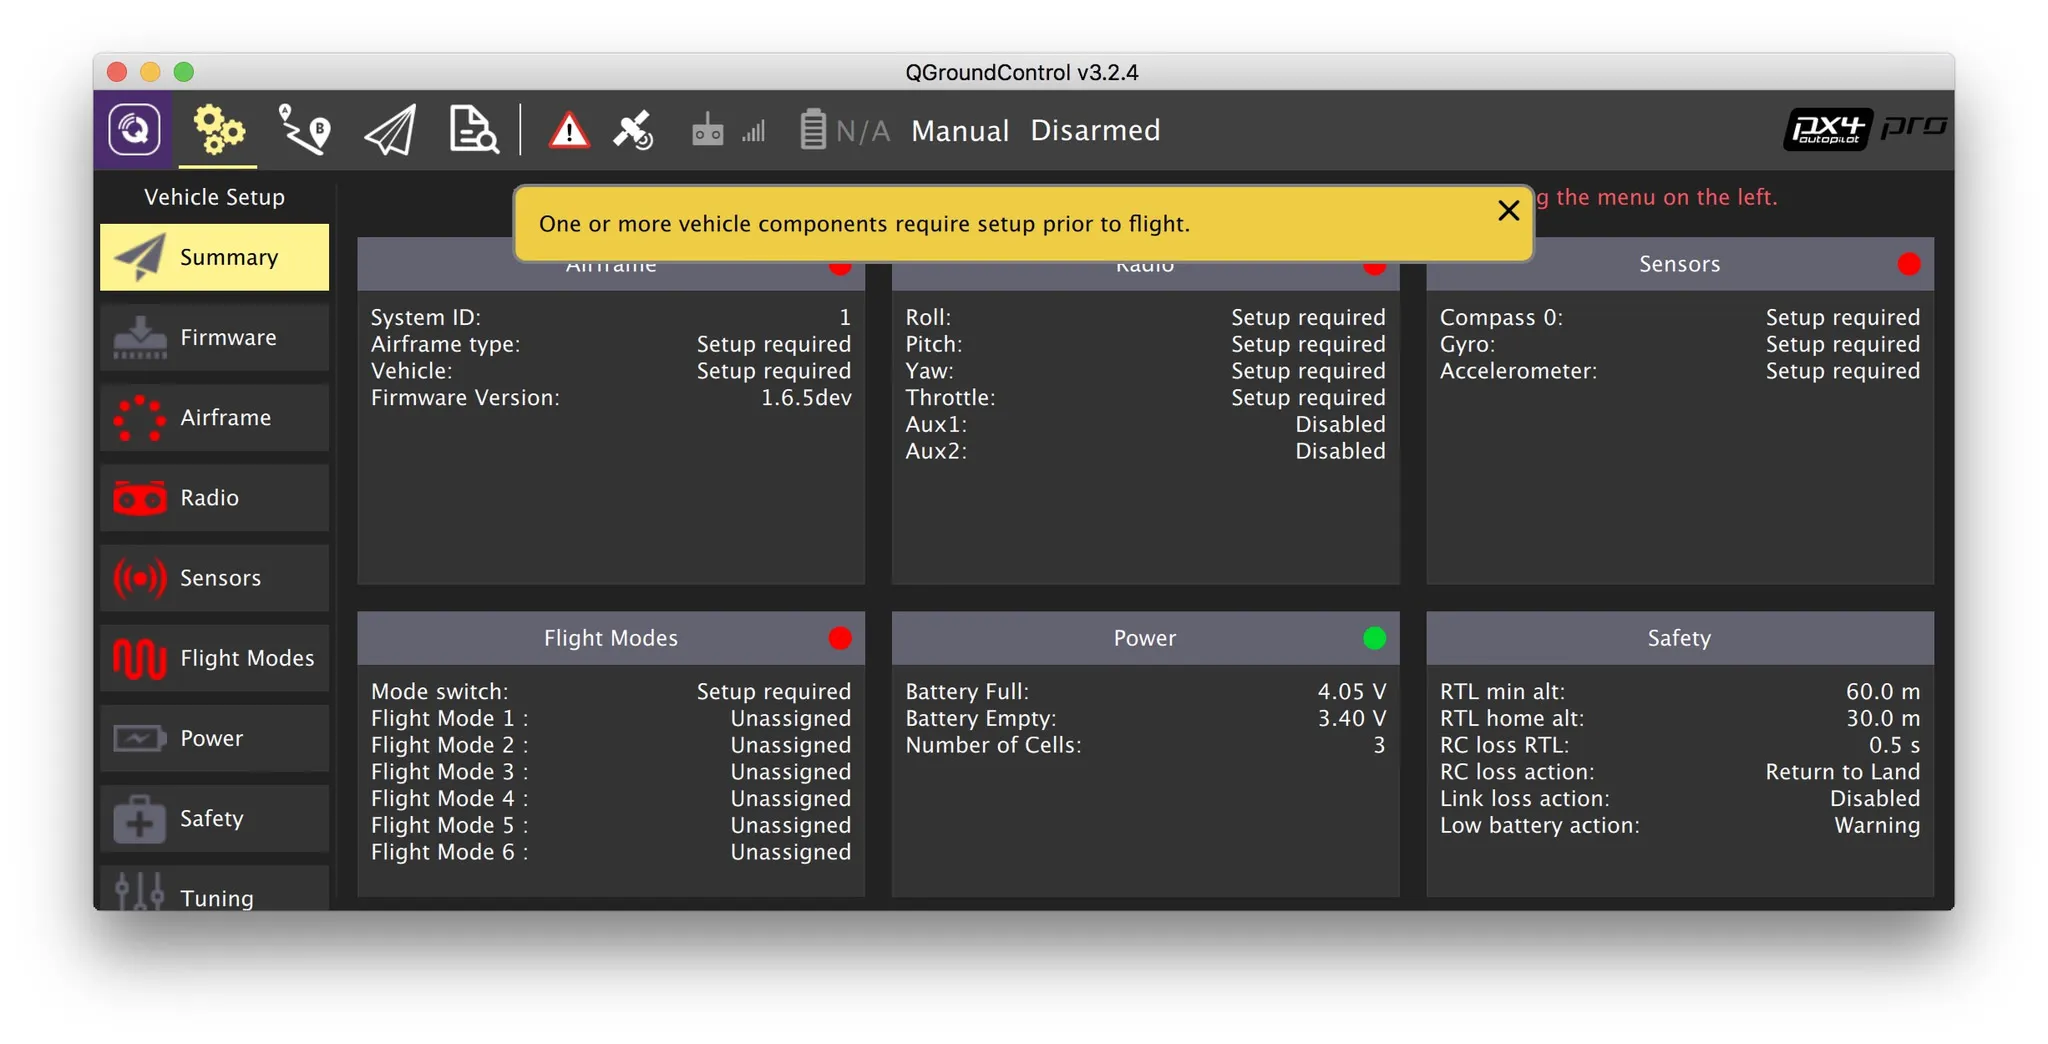
Open the Firmware tab in QGroundControl.
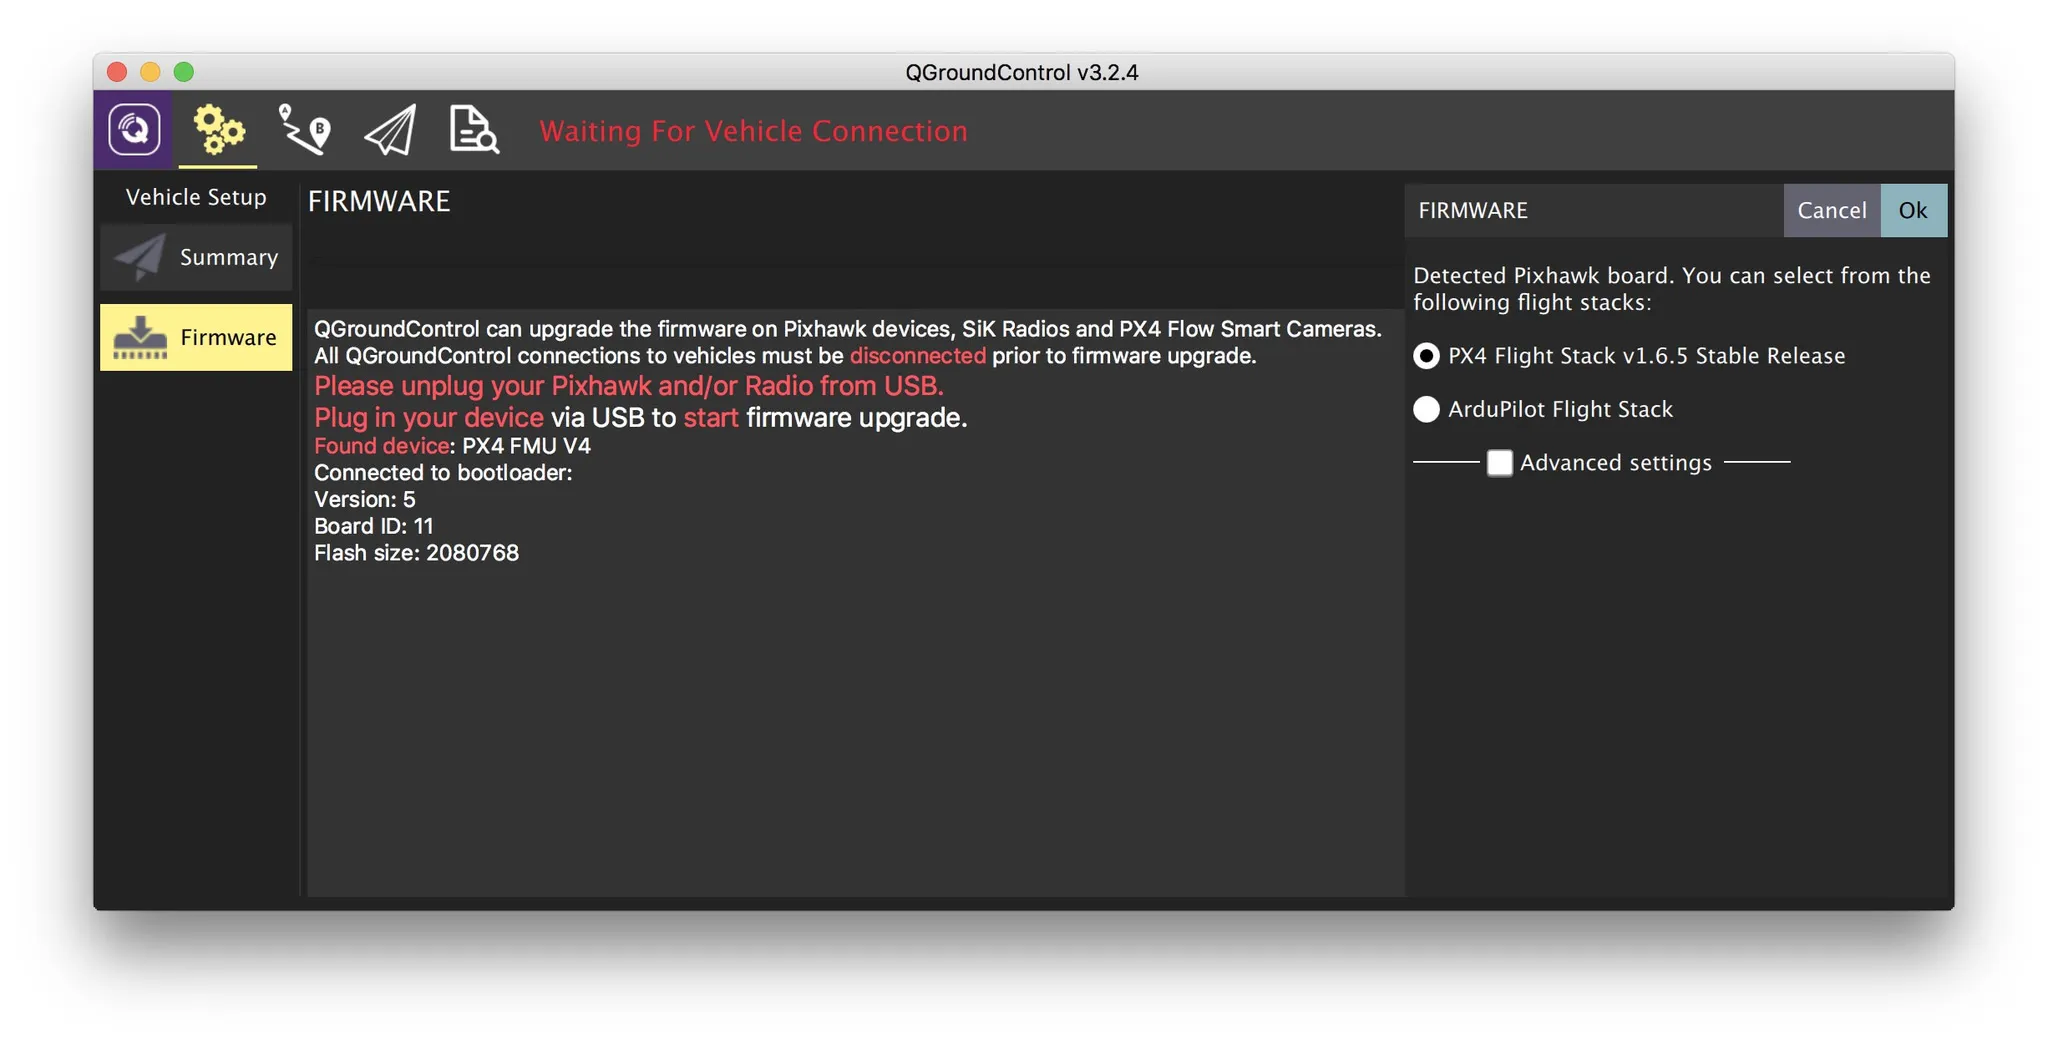
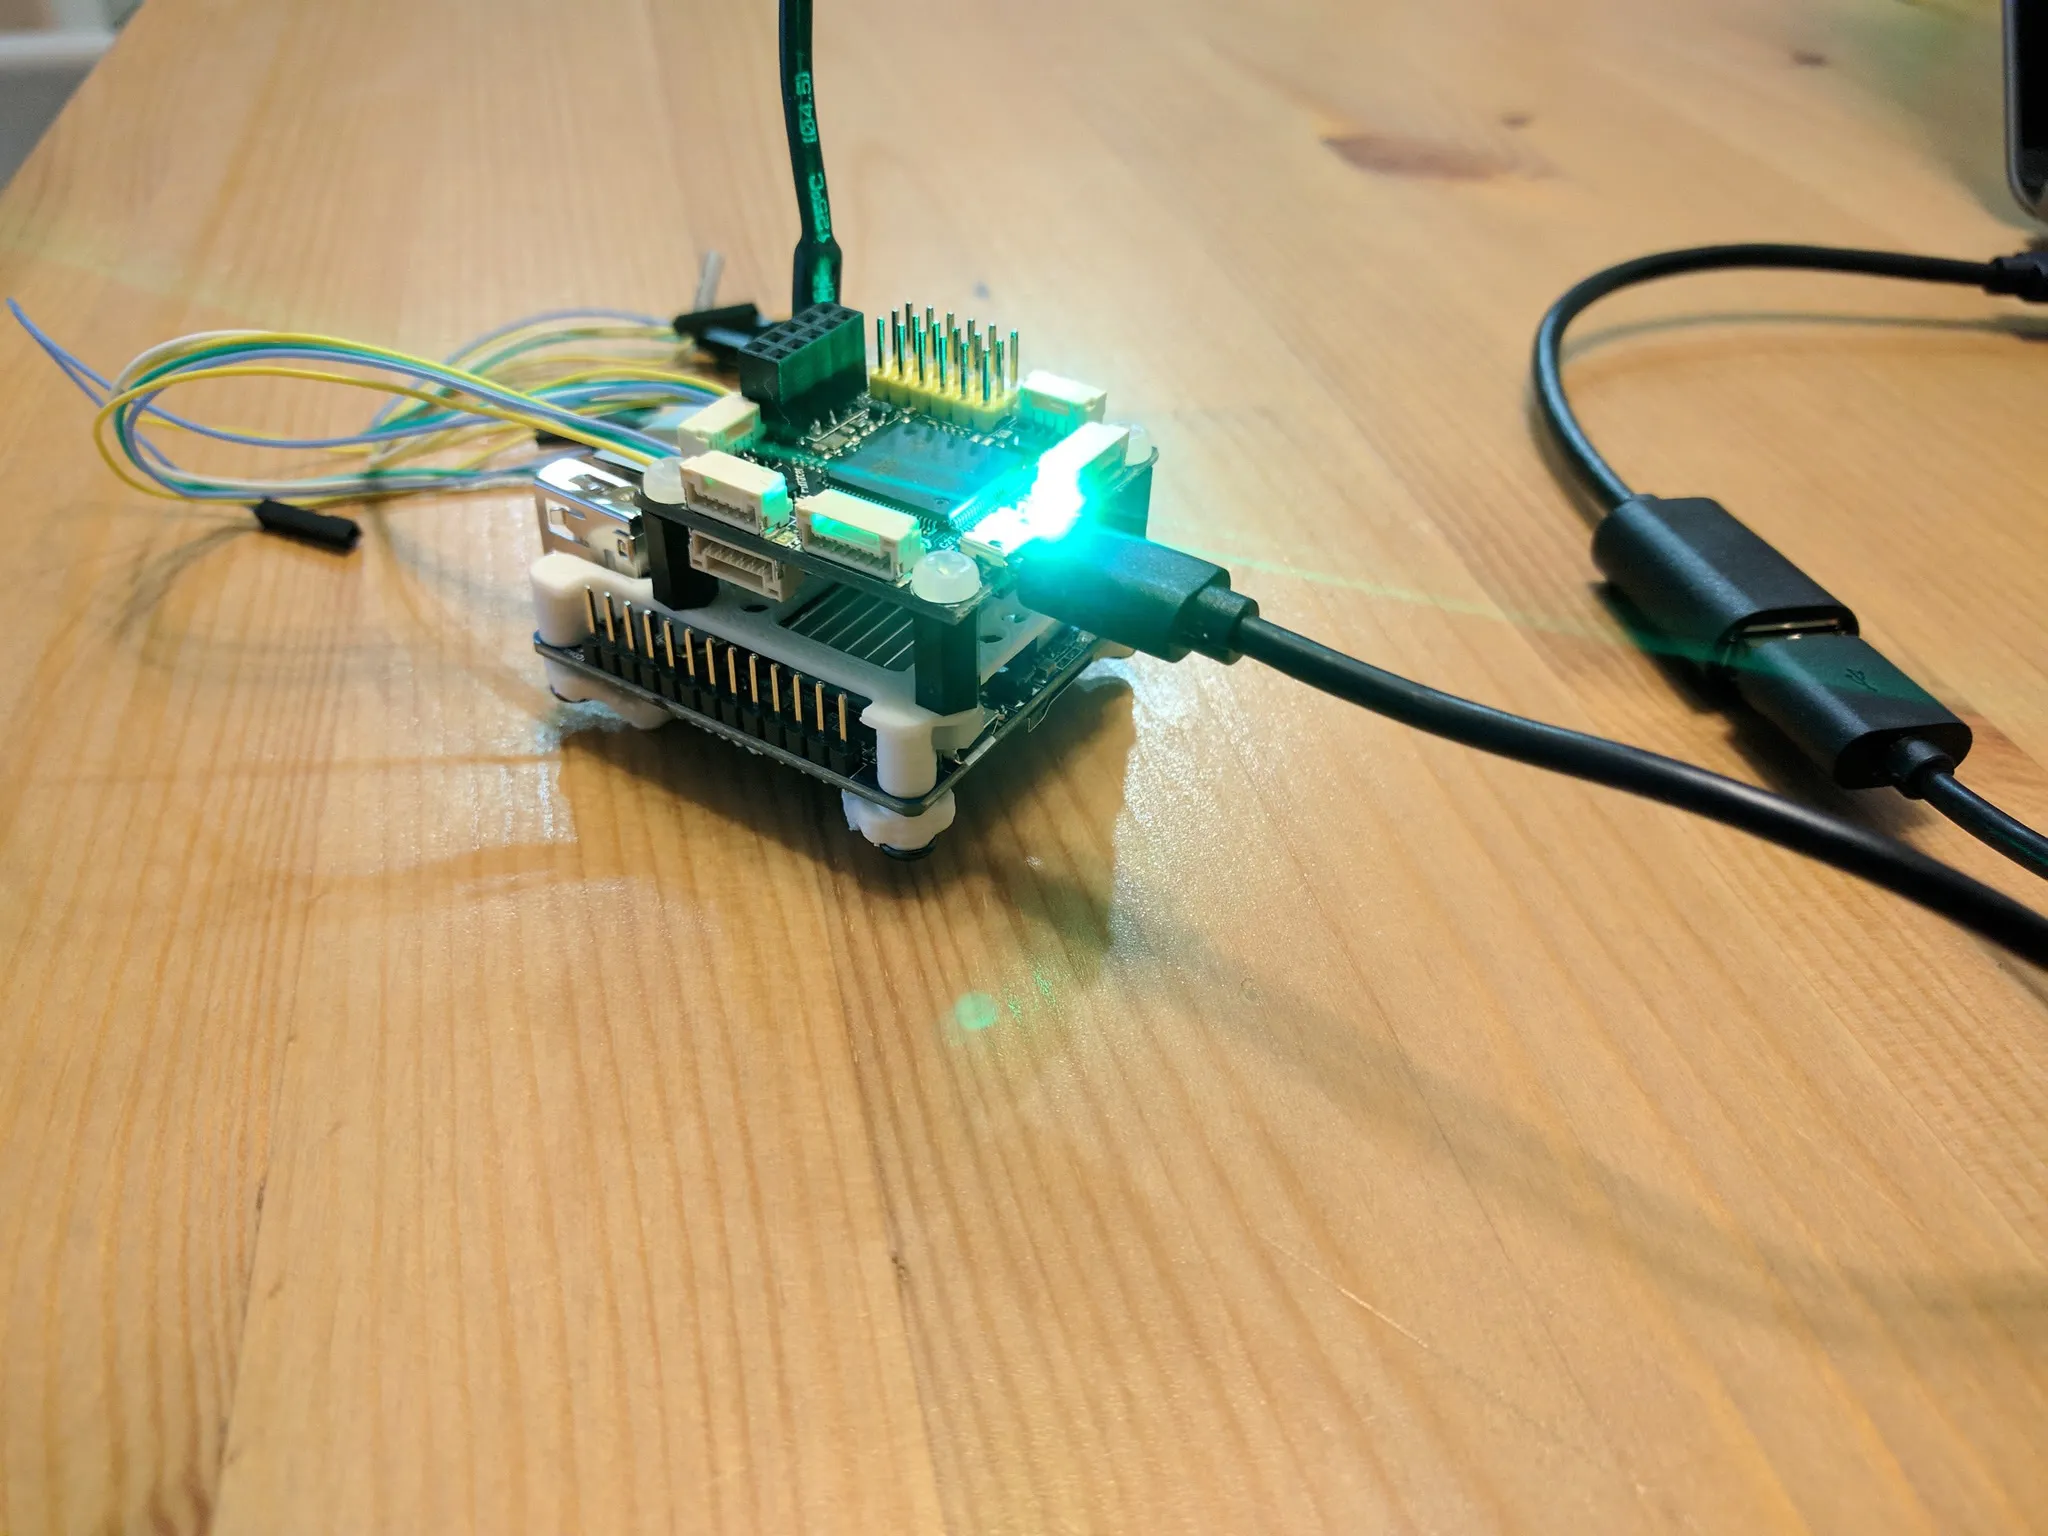
Plug in your Pixracer and hit “OK” on the right-hand side to flash the latest firmware. You must plug in the flight controller after opening the firmware tab in order to flash firmware.
You’ll be prompted to set up the vehicle when flashing completes.
PX4 Configuration
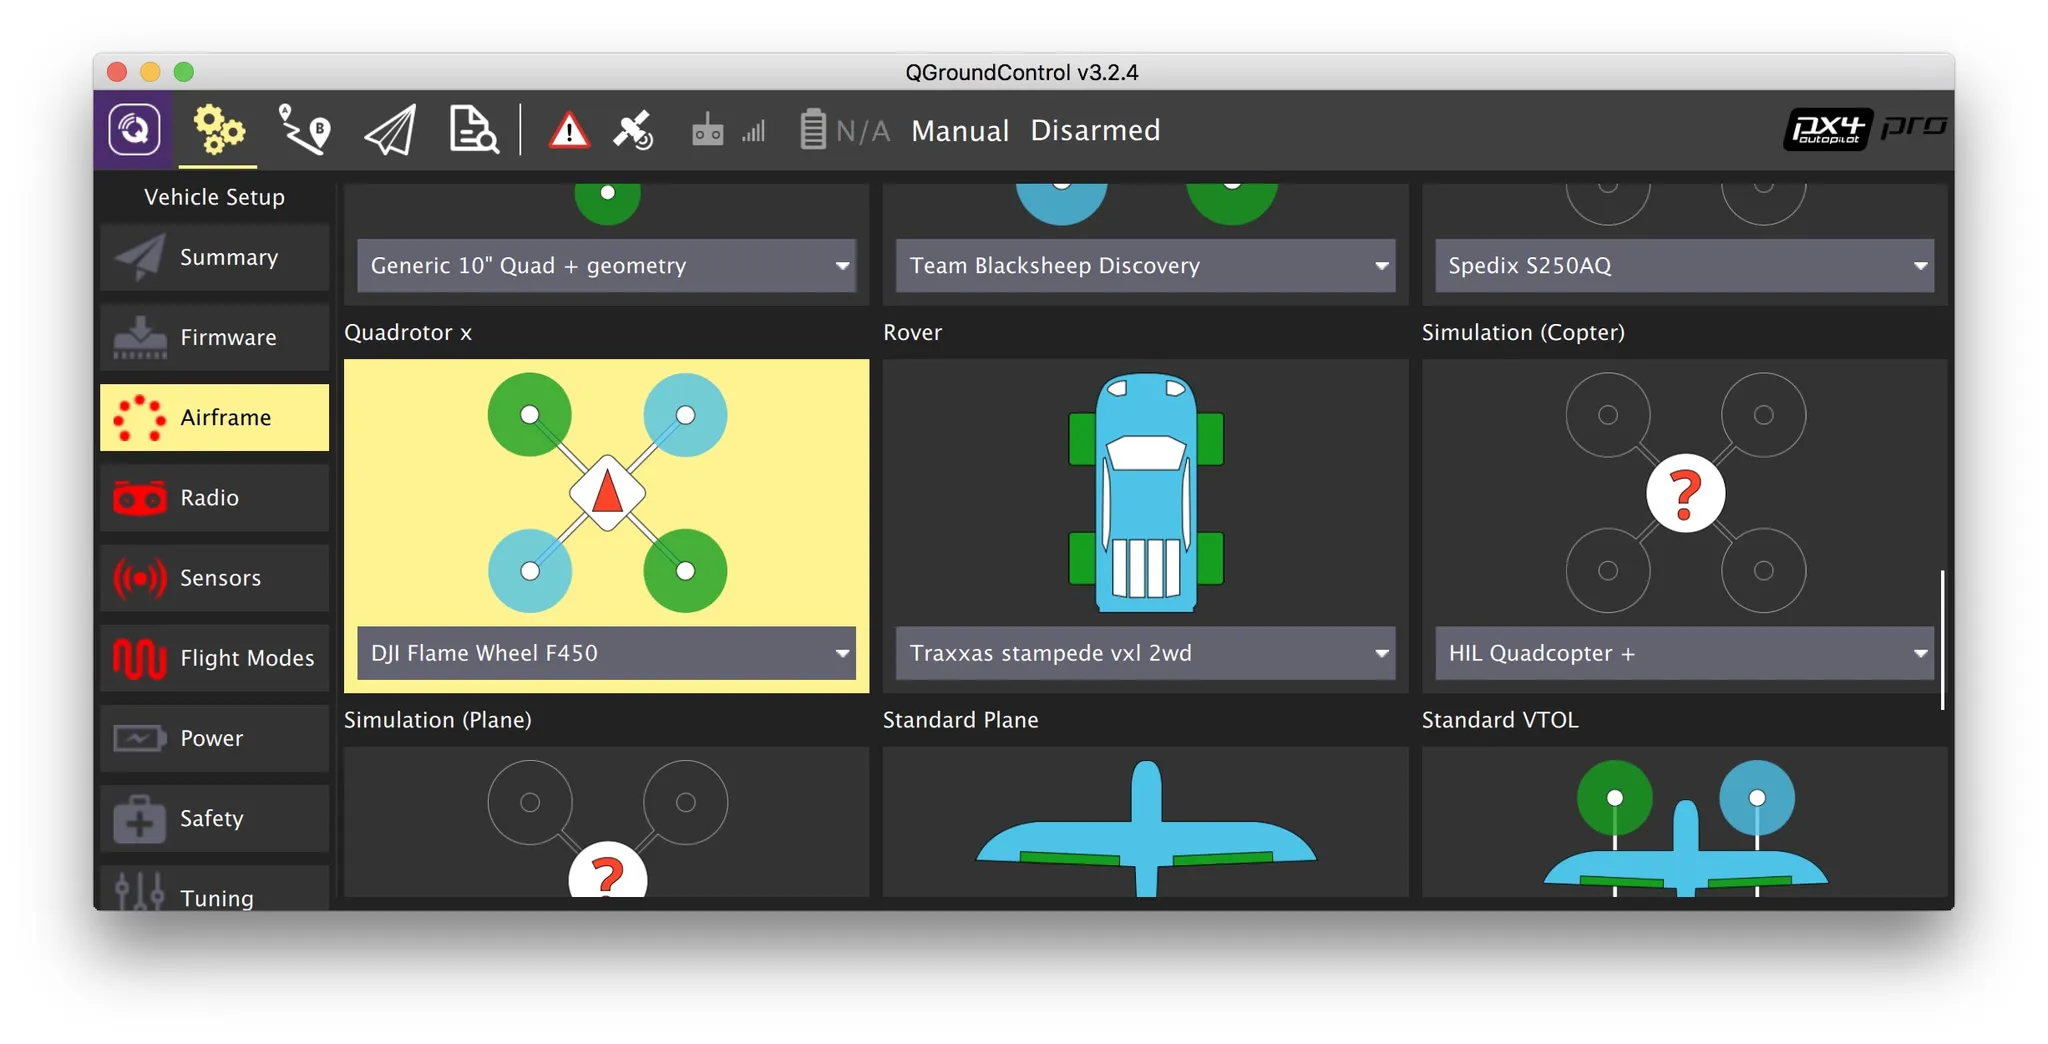
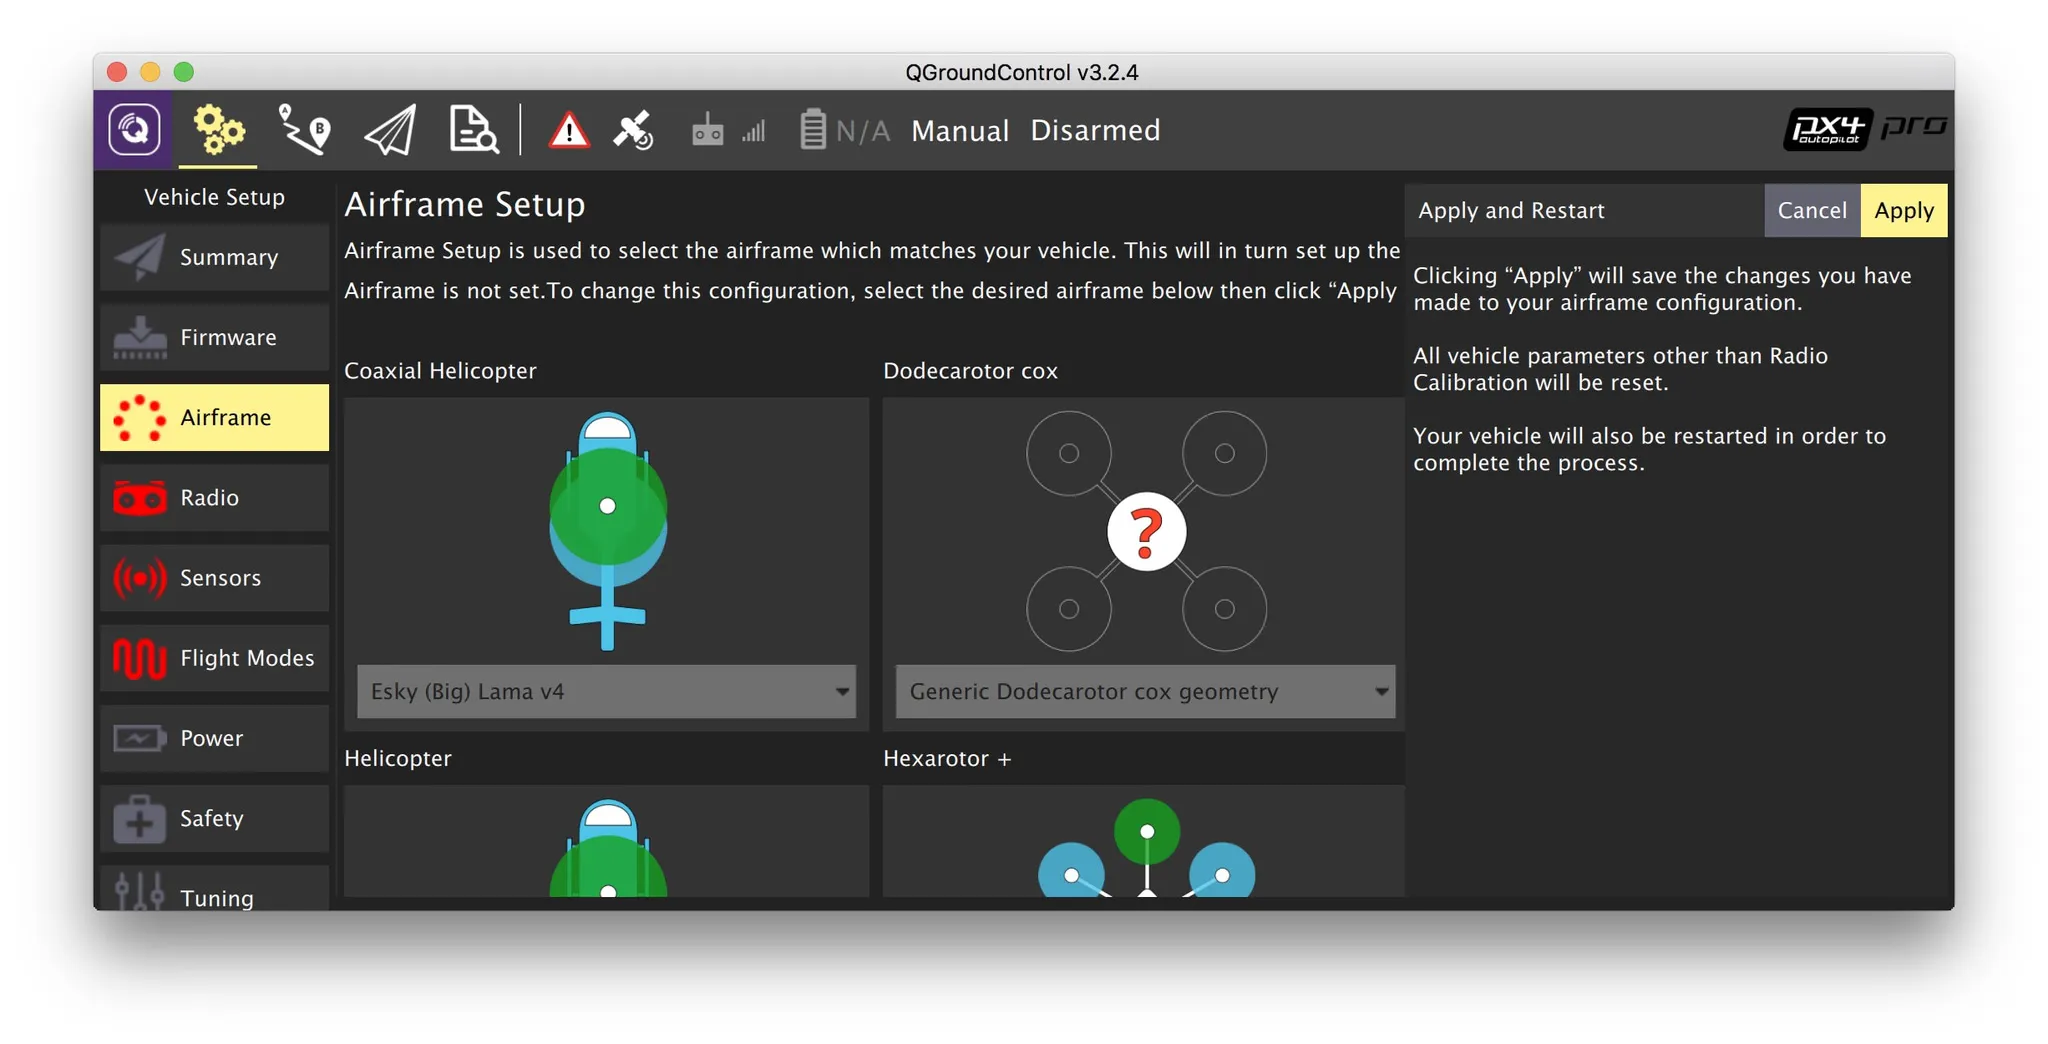
Start with the airframe configuration. I’ll pick a DJI F450.
Scroll to the top for the save button.
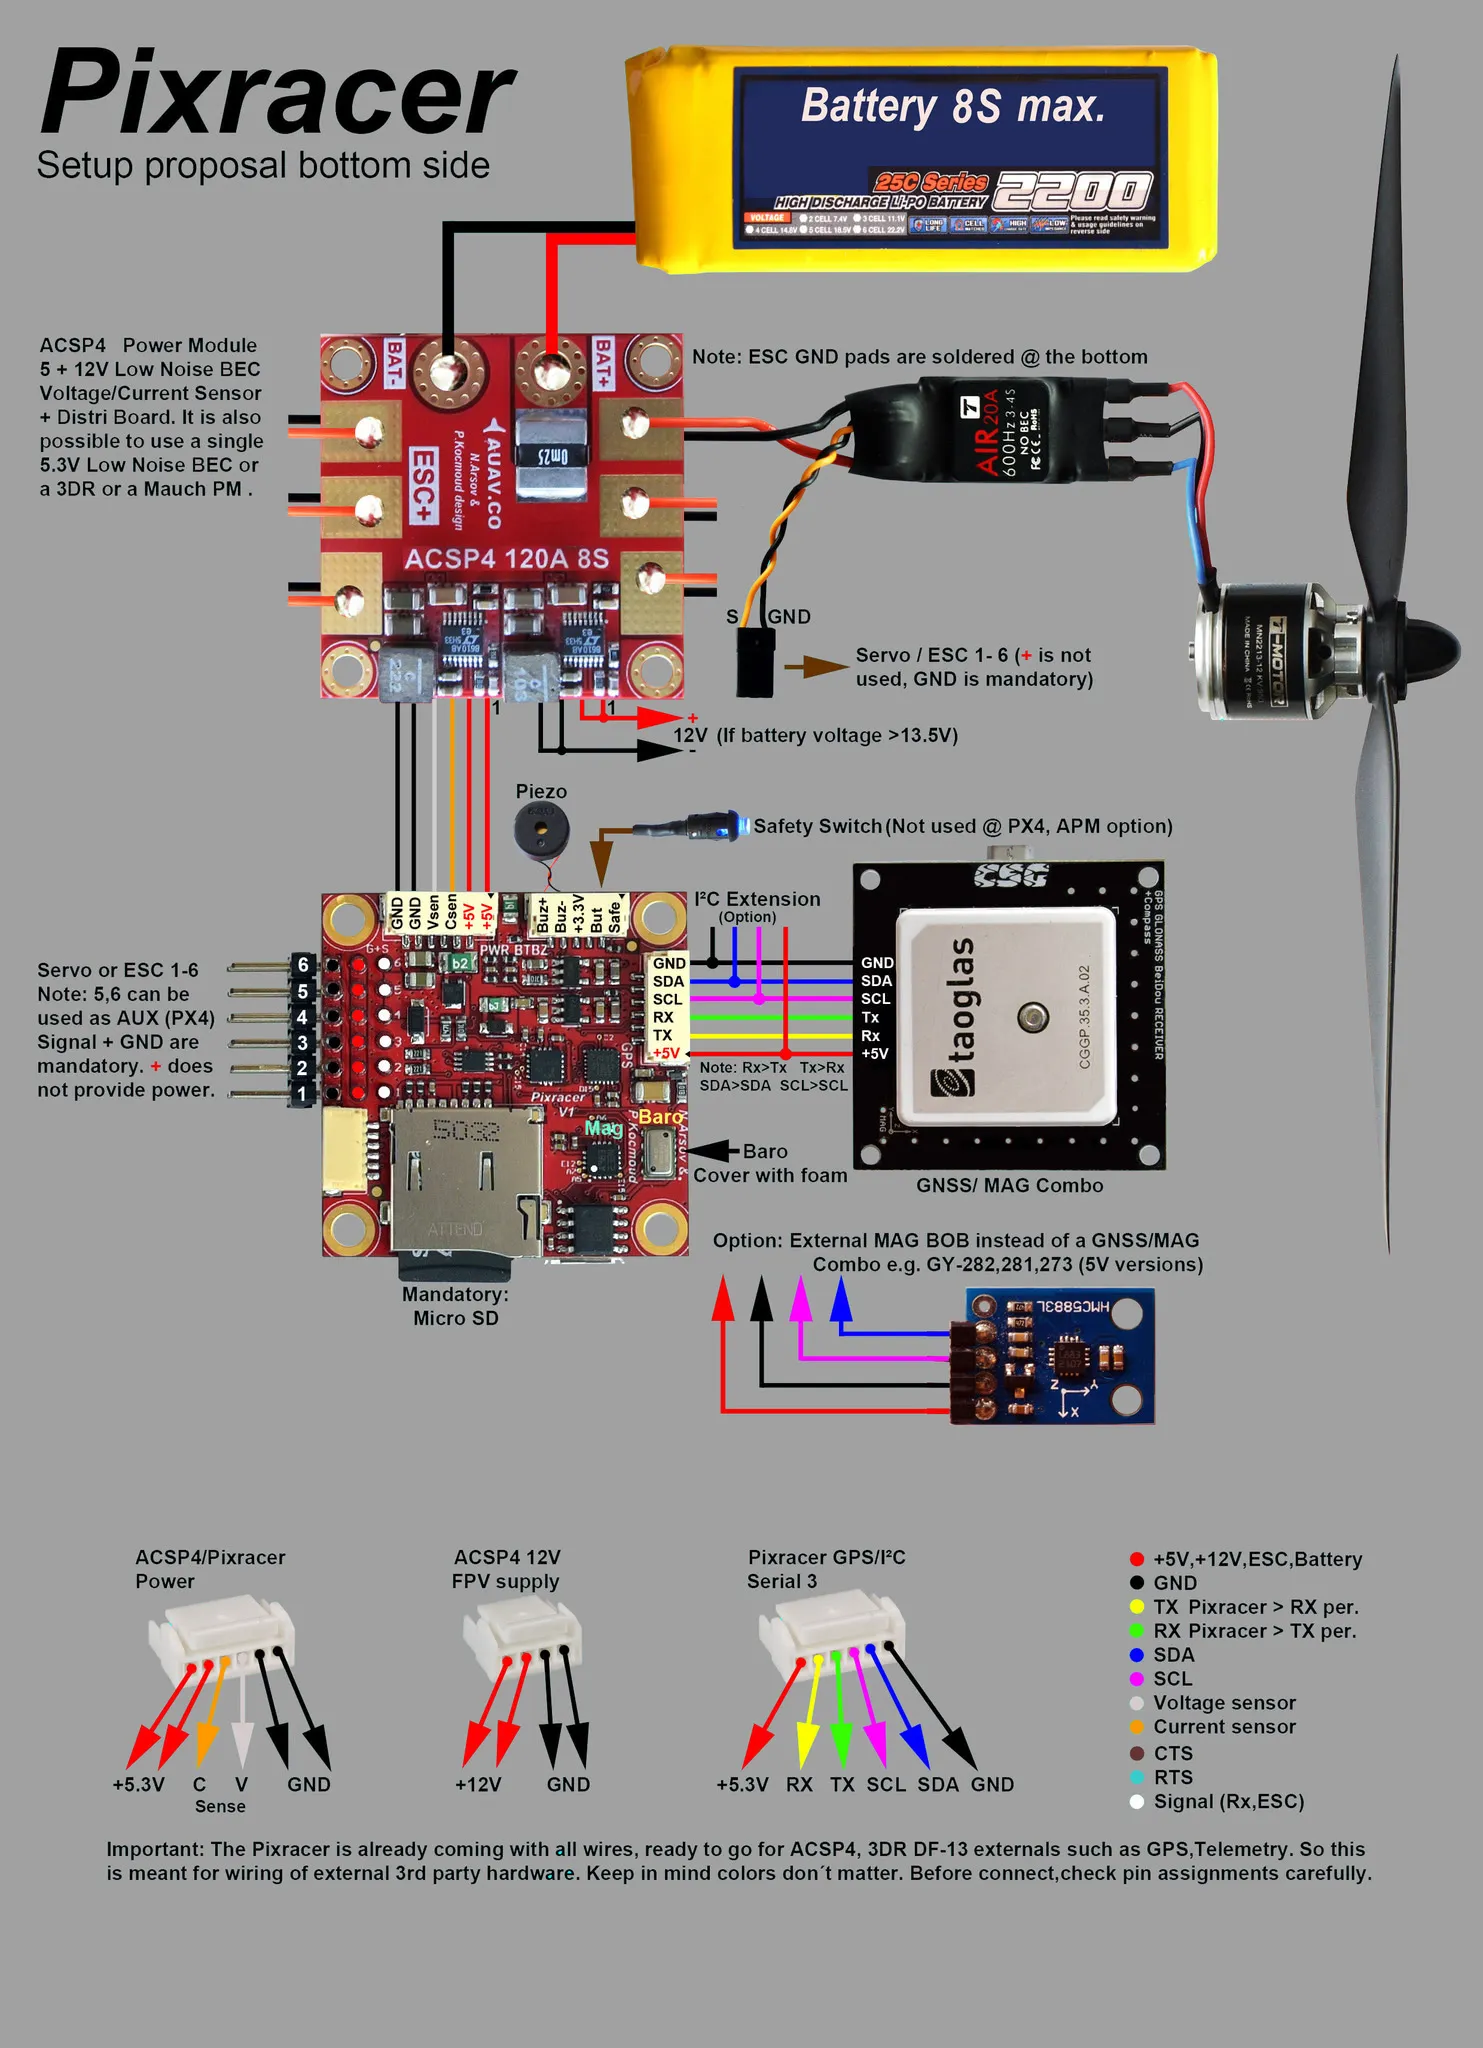
Connect your RX as shown in the Pixracer setup guide.
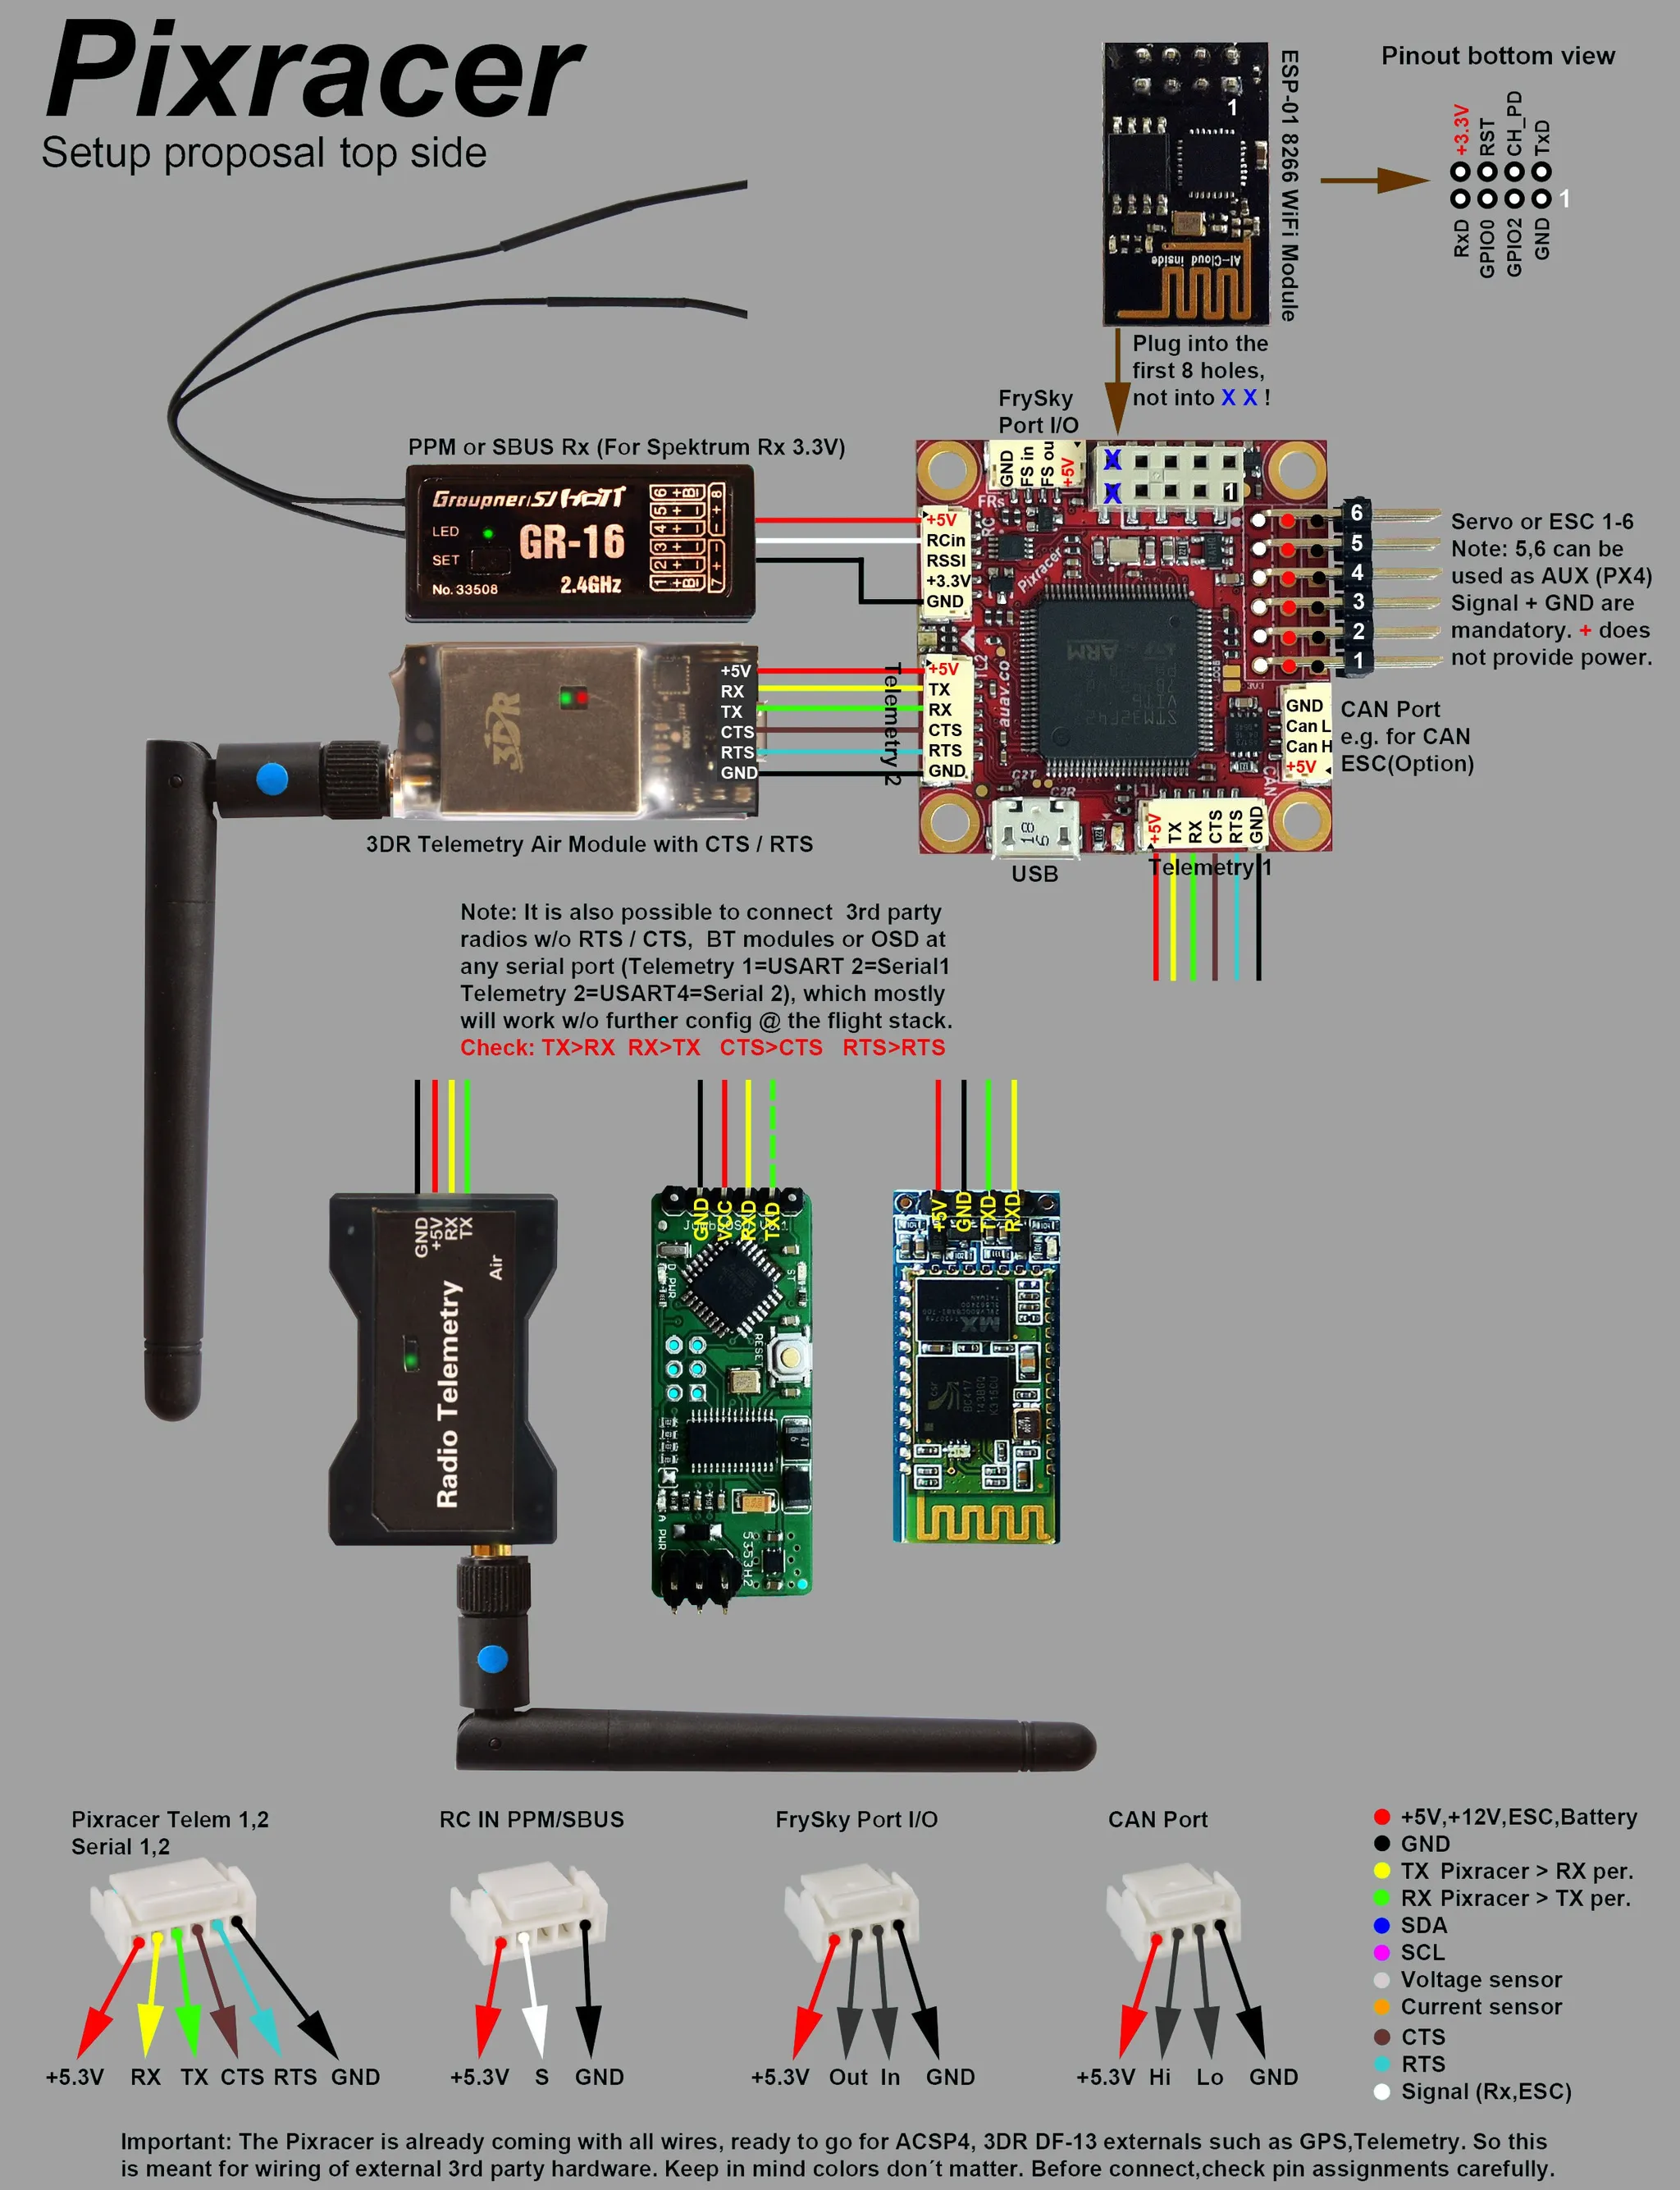
I’m using an iA6B; here’s the pinout.
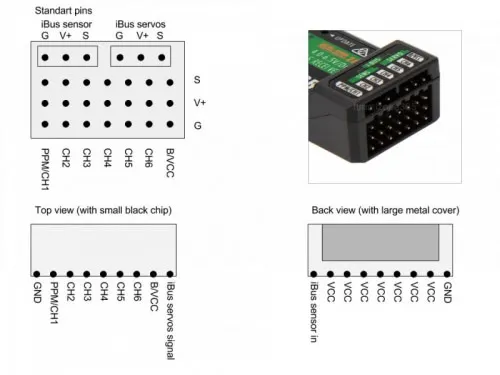
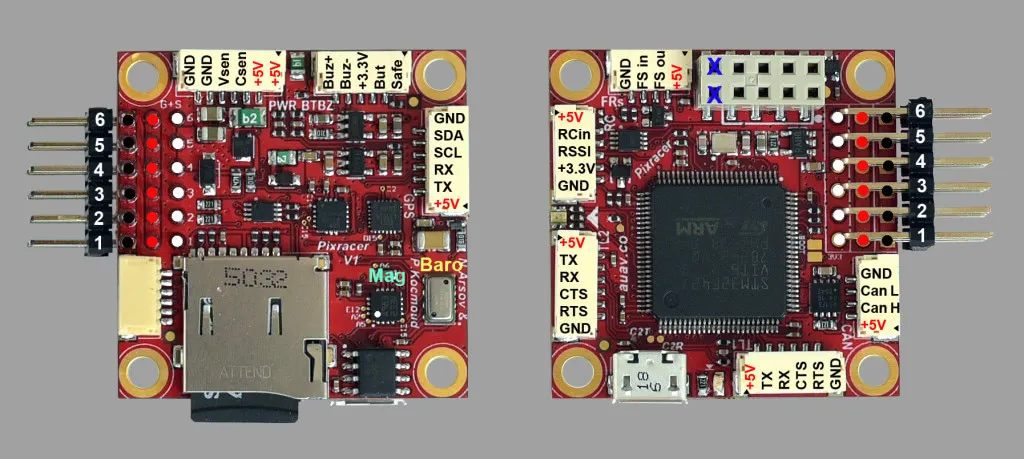
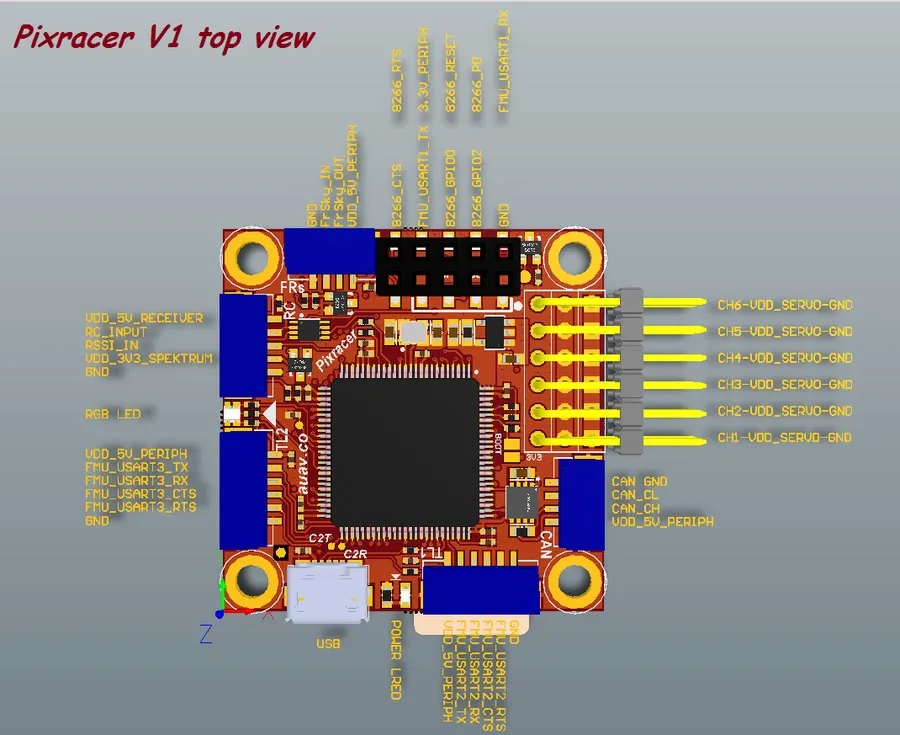
And the Pixracer pinouts.
Connect your GPS / magnetometer combo to the I2C port.
Do all the radio and sensor calibrations.
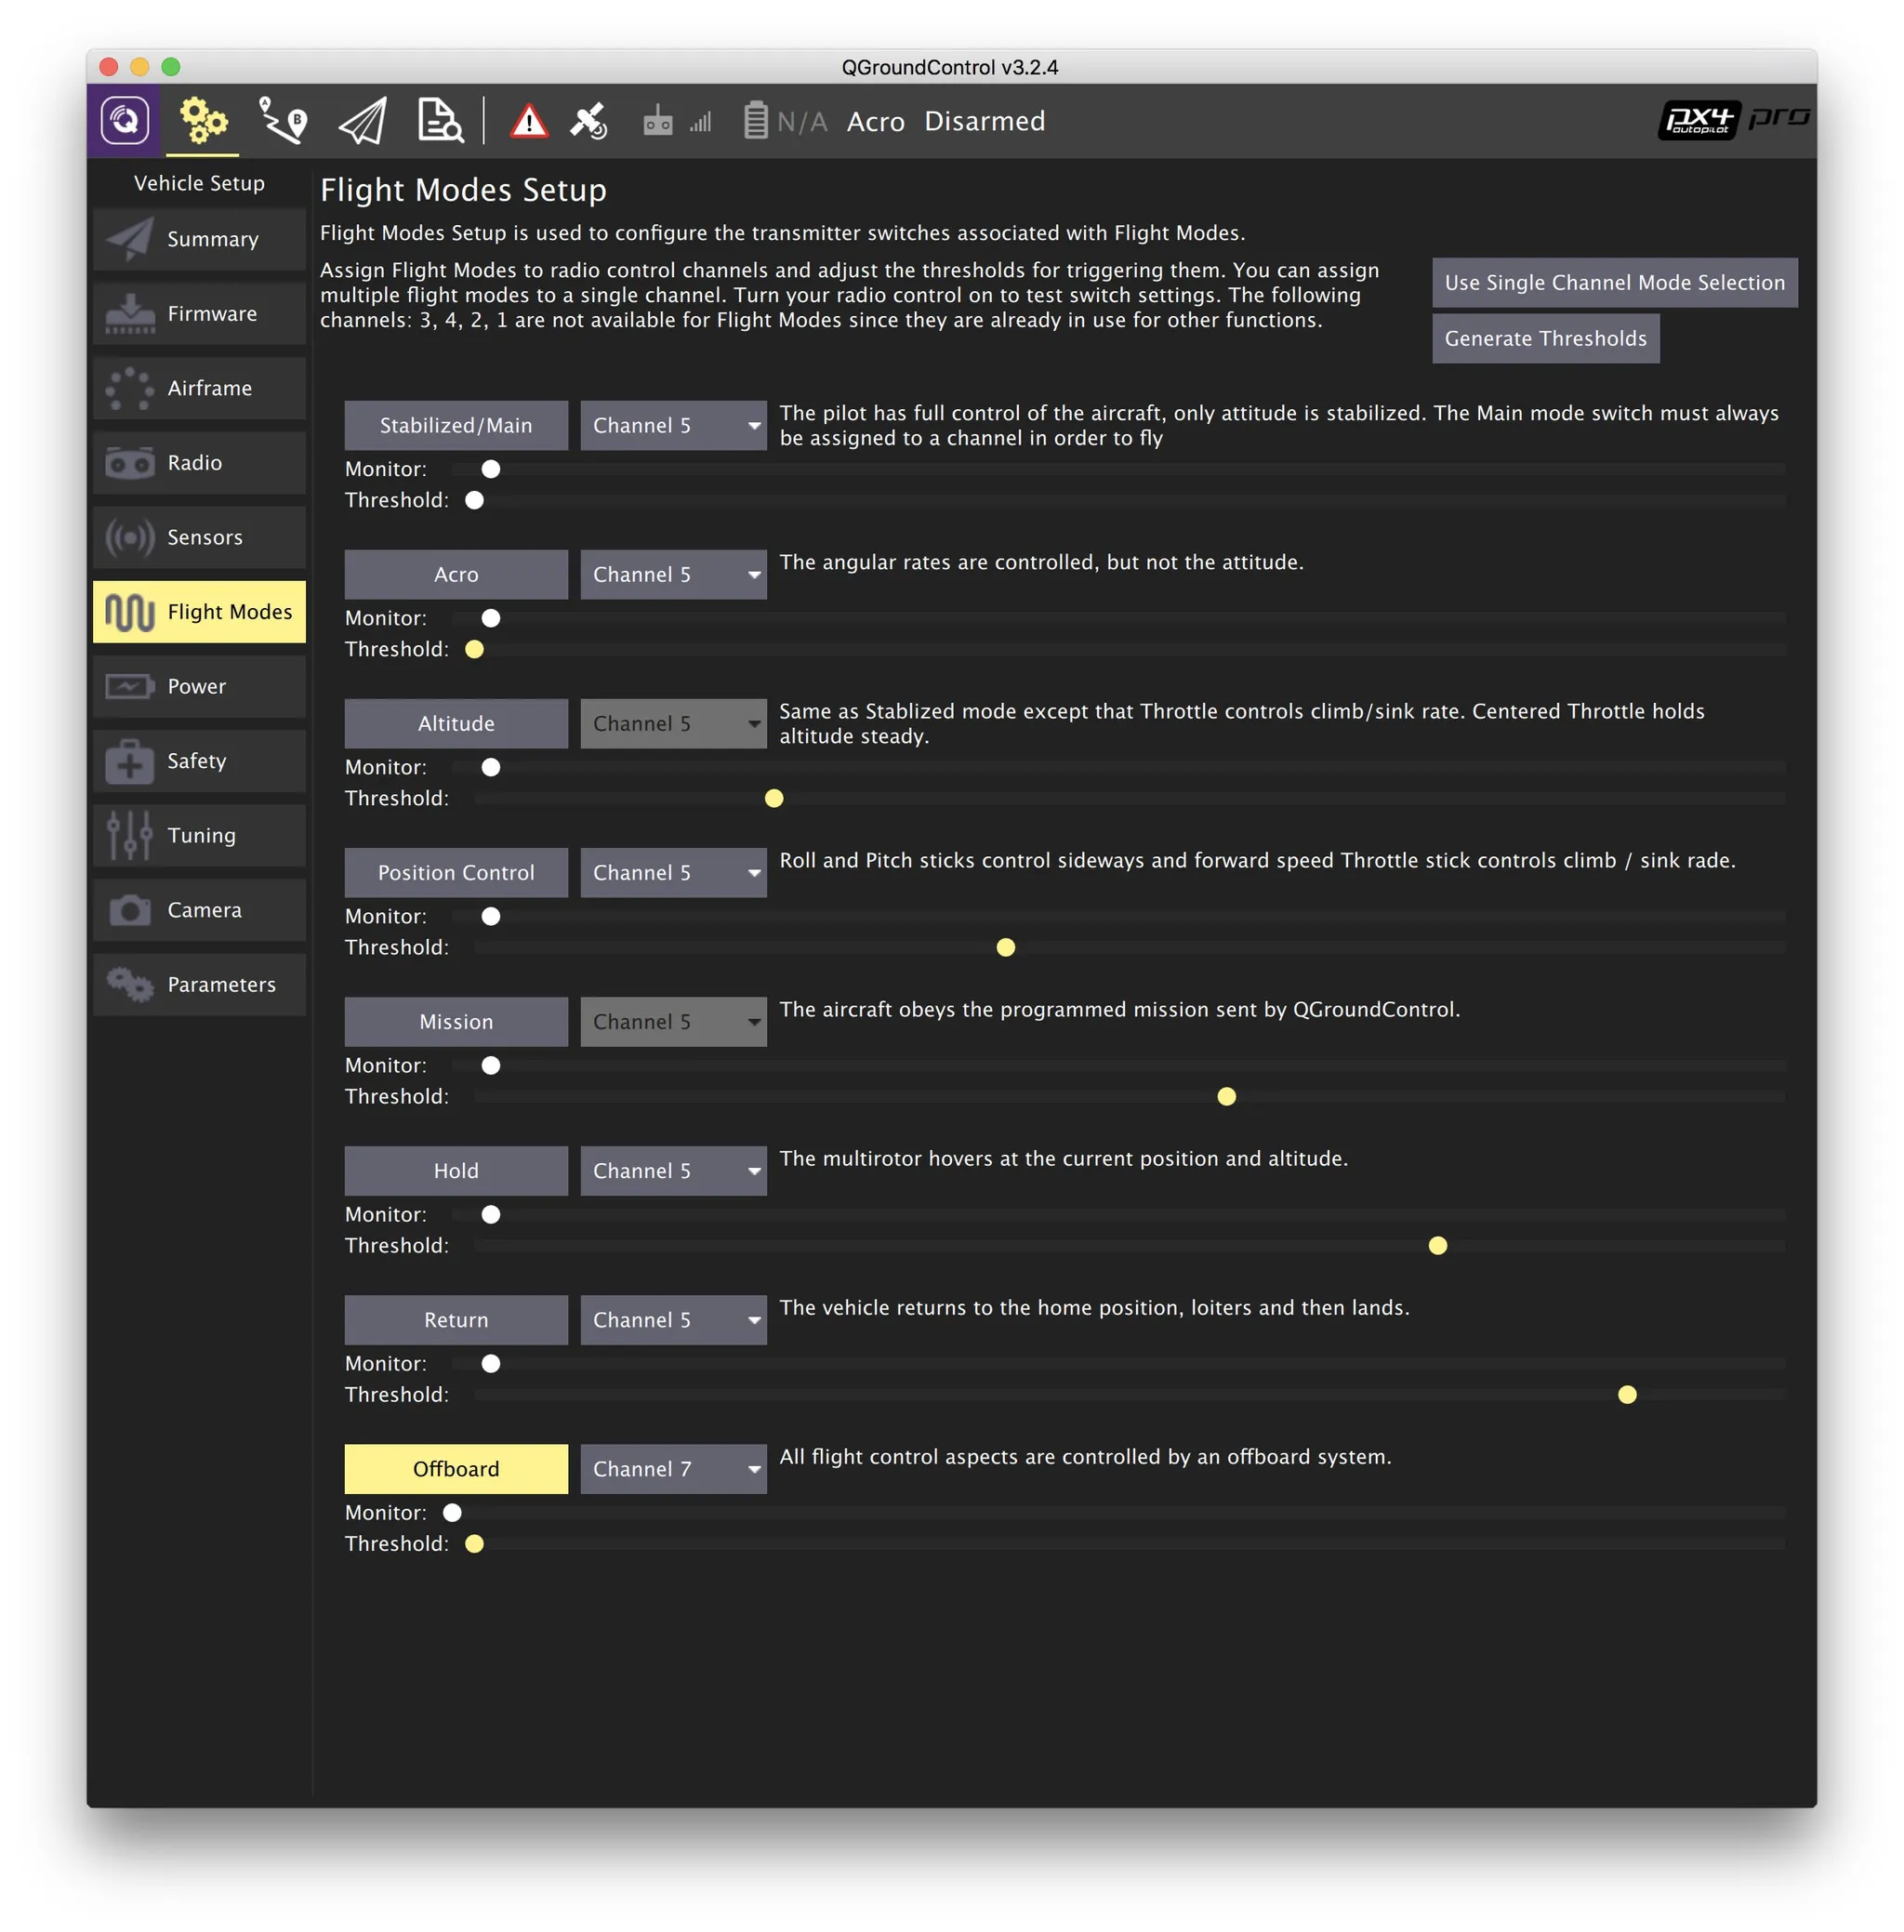
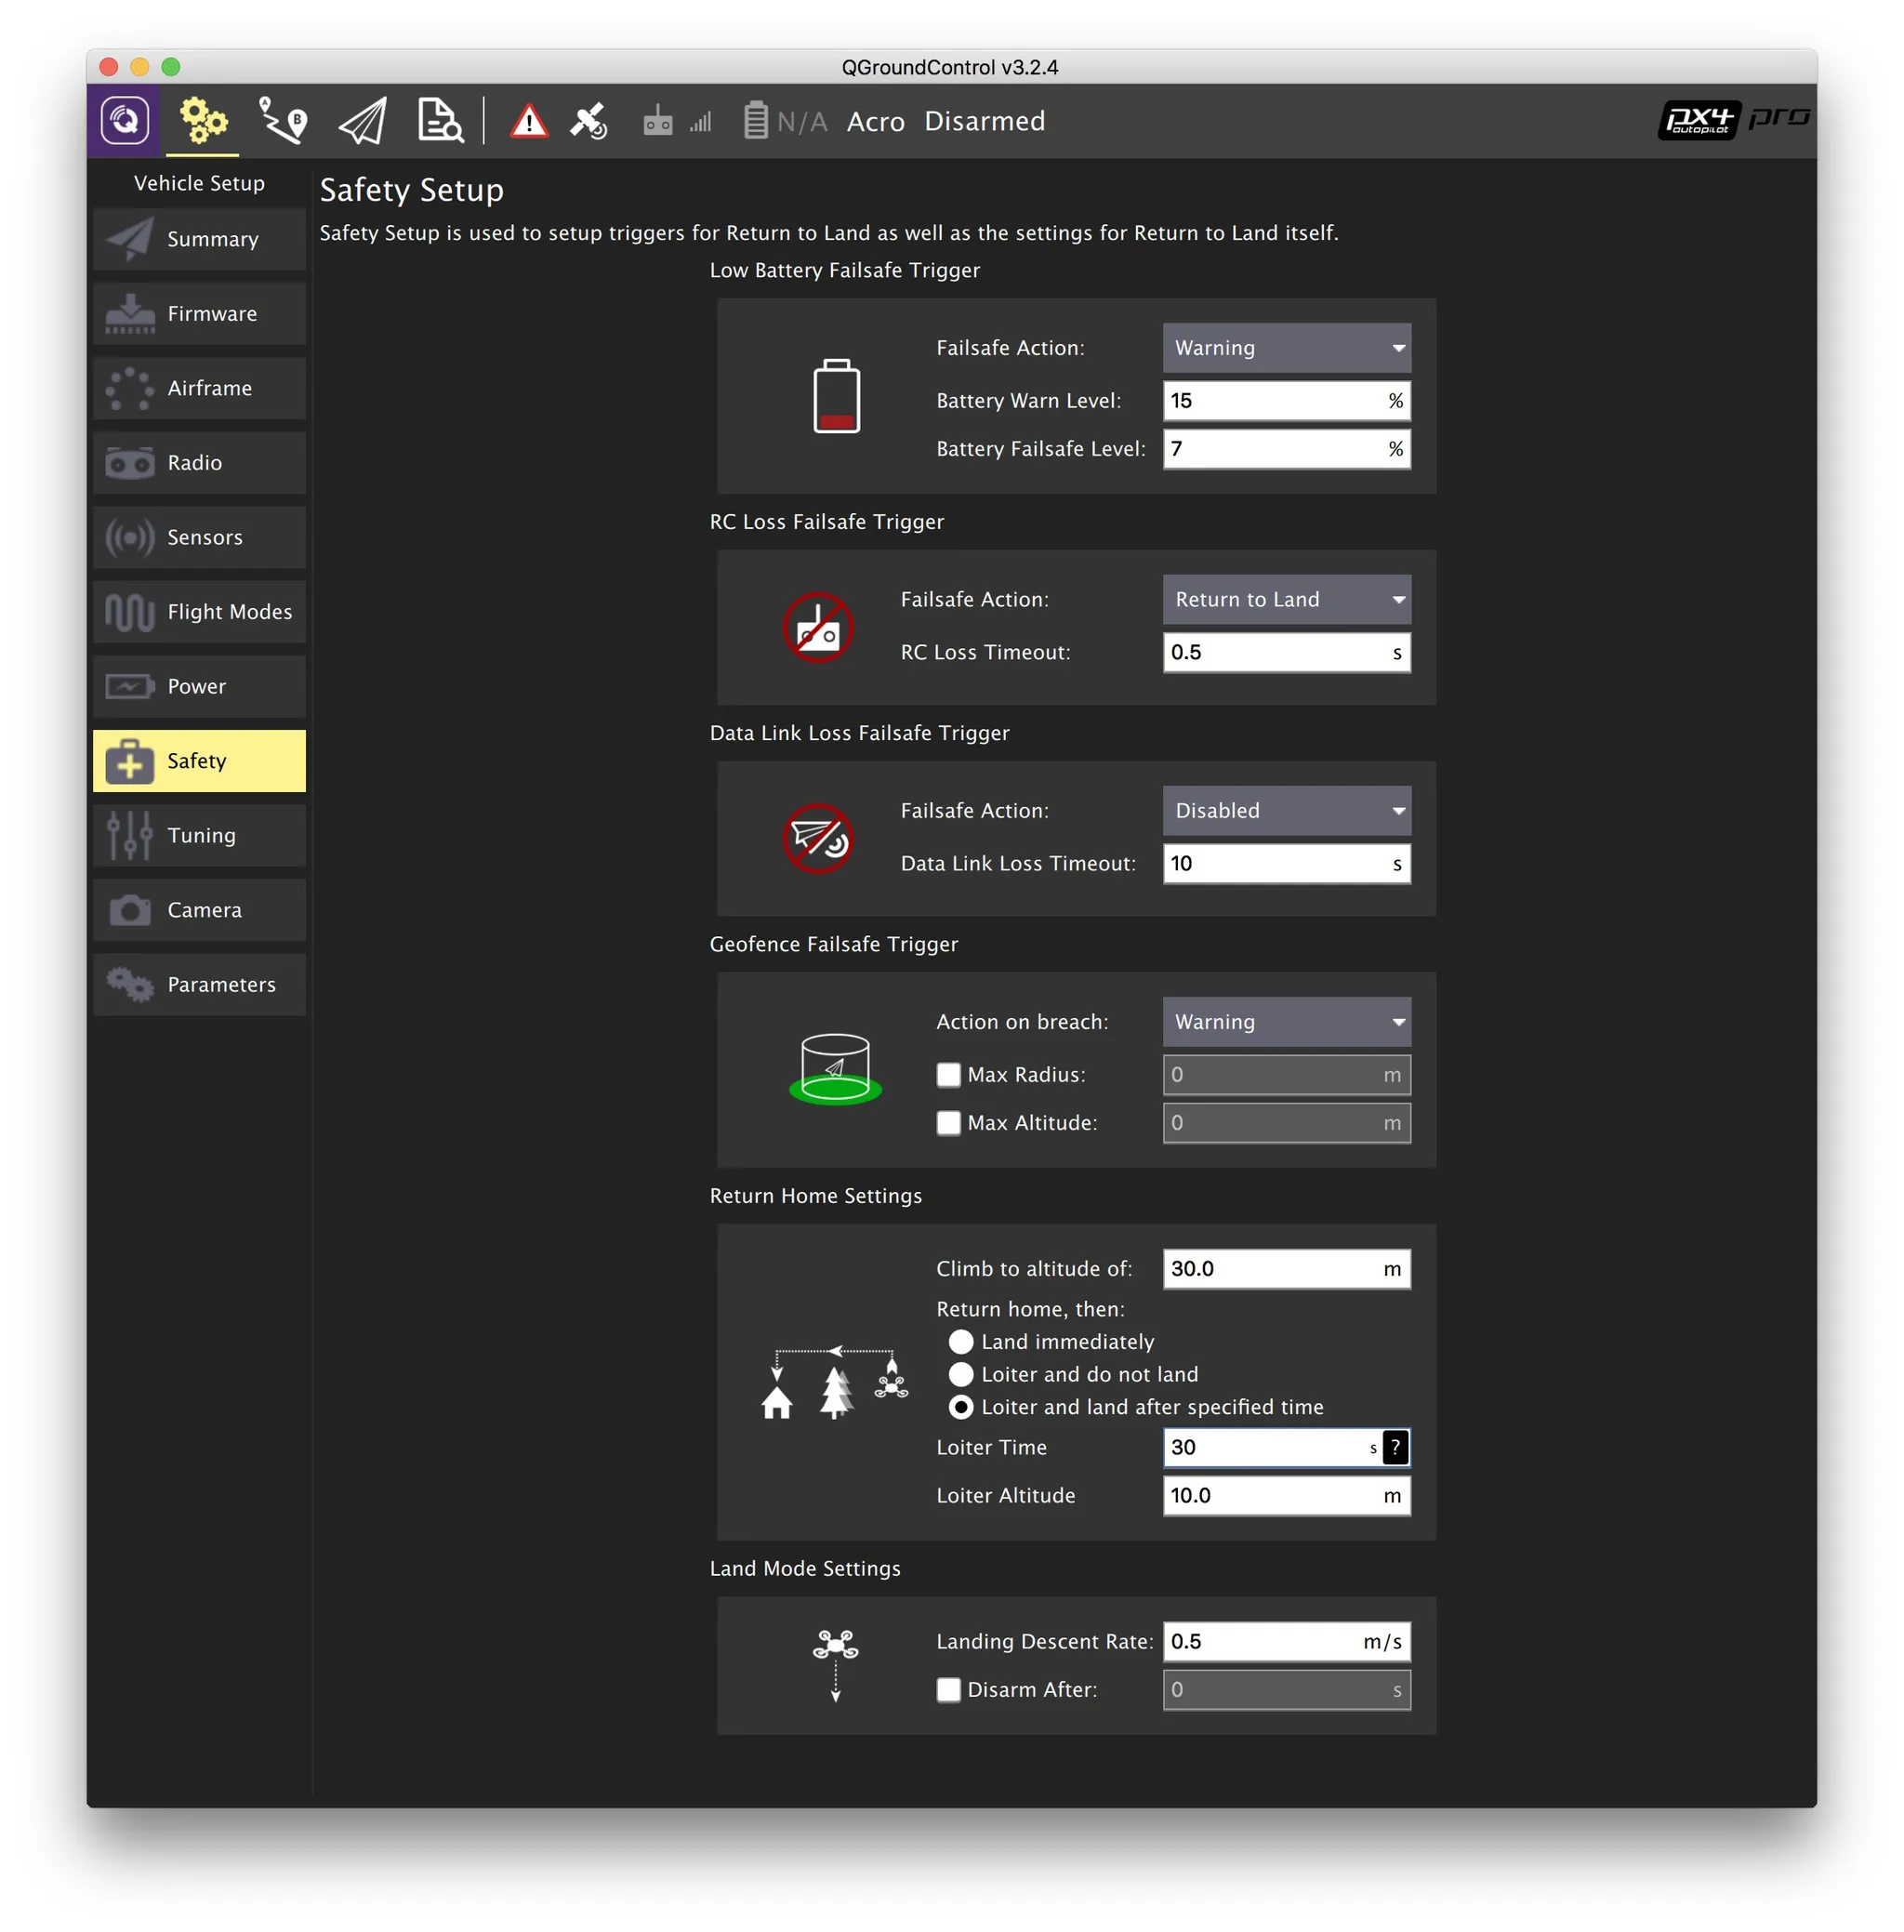
Then configure flight modes and safety settings.
Offboard Connection
Connect TELEM2 (UART3) to a USB-UART converter (I like the CP2102) and plug it into your computer.
More Reading
MAVROS offboard with ROS Kinetic: https://uav-lab.org/2017/08/15/px4-research-log-12-mavros-off-board-control-1/
Install ROS
Directions per: http://wiki.ros.org/kinetic/Installation/Ubuntu
Set up repos & keys:
sudo sh -c 'echo "deb [http://packages.ros.org/ros/ubuntu](http://packages.ros.org/ros/ubuntu) $(lsb_release -sc) main" > /etc/apt/sources.list.d/ros-latest.list'
sudo apt-key adv --keyserver hkp://ha.pool.sks-keyservers.net:80 --recv-key 421C365BD9FF1F717815A3895523BAEEB01FA116
Install:
sudo apt-get update
sudo apt-get install -y ros-kinetic-desktop-full
Init rosdep:
sudo rosdep init
rosdep update
Install python-rosinstall:
sudo apt-get install python-rosinstallUpdate your env .zshrc:
ROS_SETUP=/opt/ros/kinetic/setup.zsh
[ -f $ROS_SETUP ] && source $ROS_SETUP
And check to make sure it’s working:
printenv | grep ROSMake a Workspace
A ROS workspace is synonymous with an Eclipse workspace, if you’ve ever used Eclipse. This “working folder” will contain all of your projects.
mkdir -p ~/catkin_ws/src
cd ~/catkin_ws/
catkin_make
Install MAVROS
sudo apt-get install ros-kinetic-mavros ros-kinetic-mavros-extrasMake a package:
# format: catkin_create_pkg <package_name> [dependency1] [dependency2]
catkin_create_pkg px4_mavros_playground std_msgs rospy roscpp
Build it:
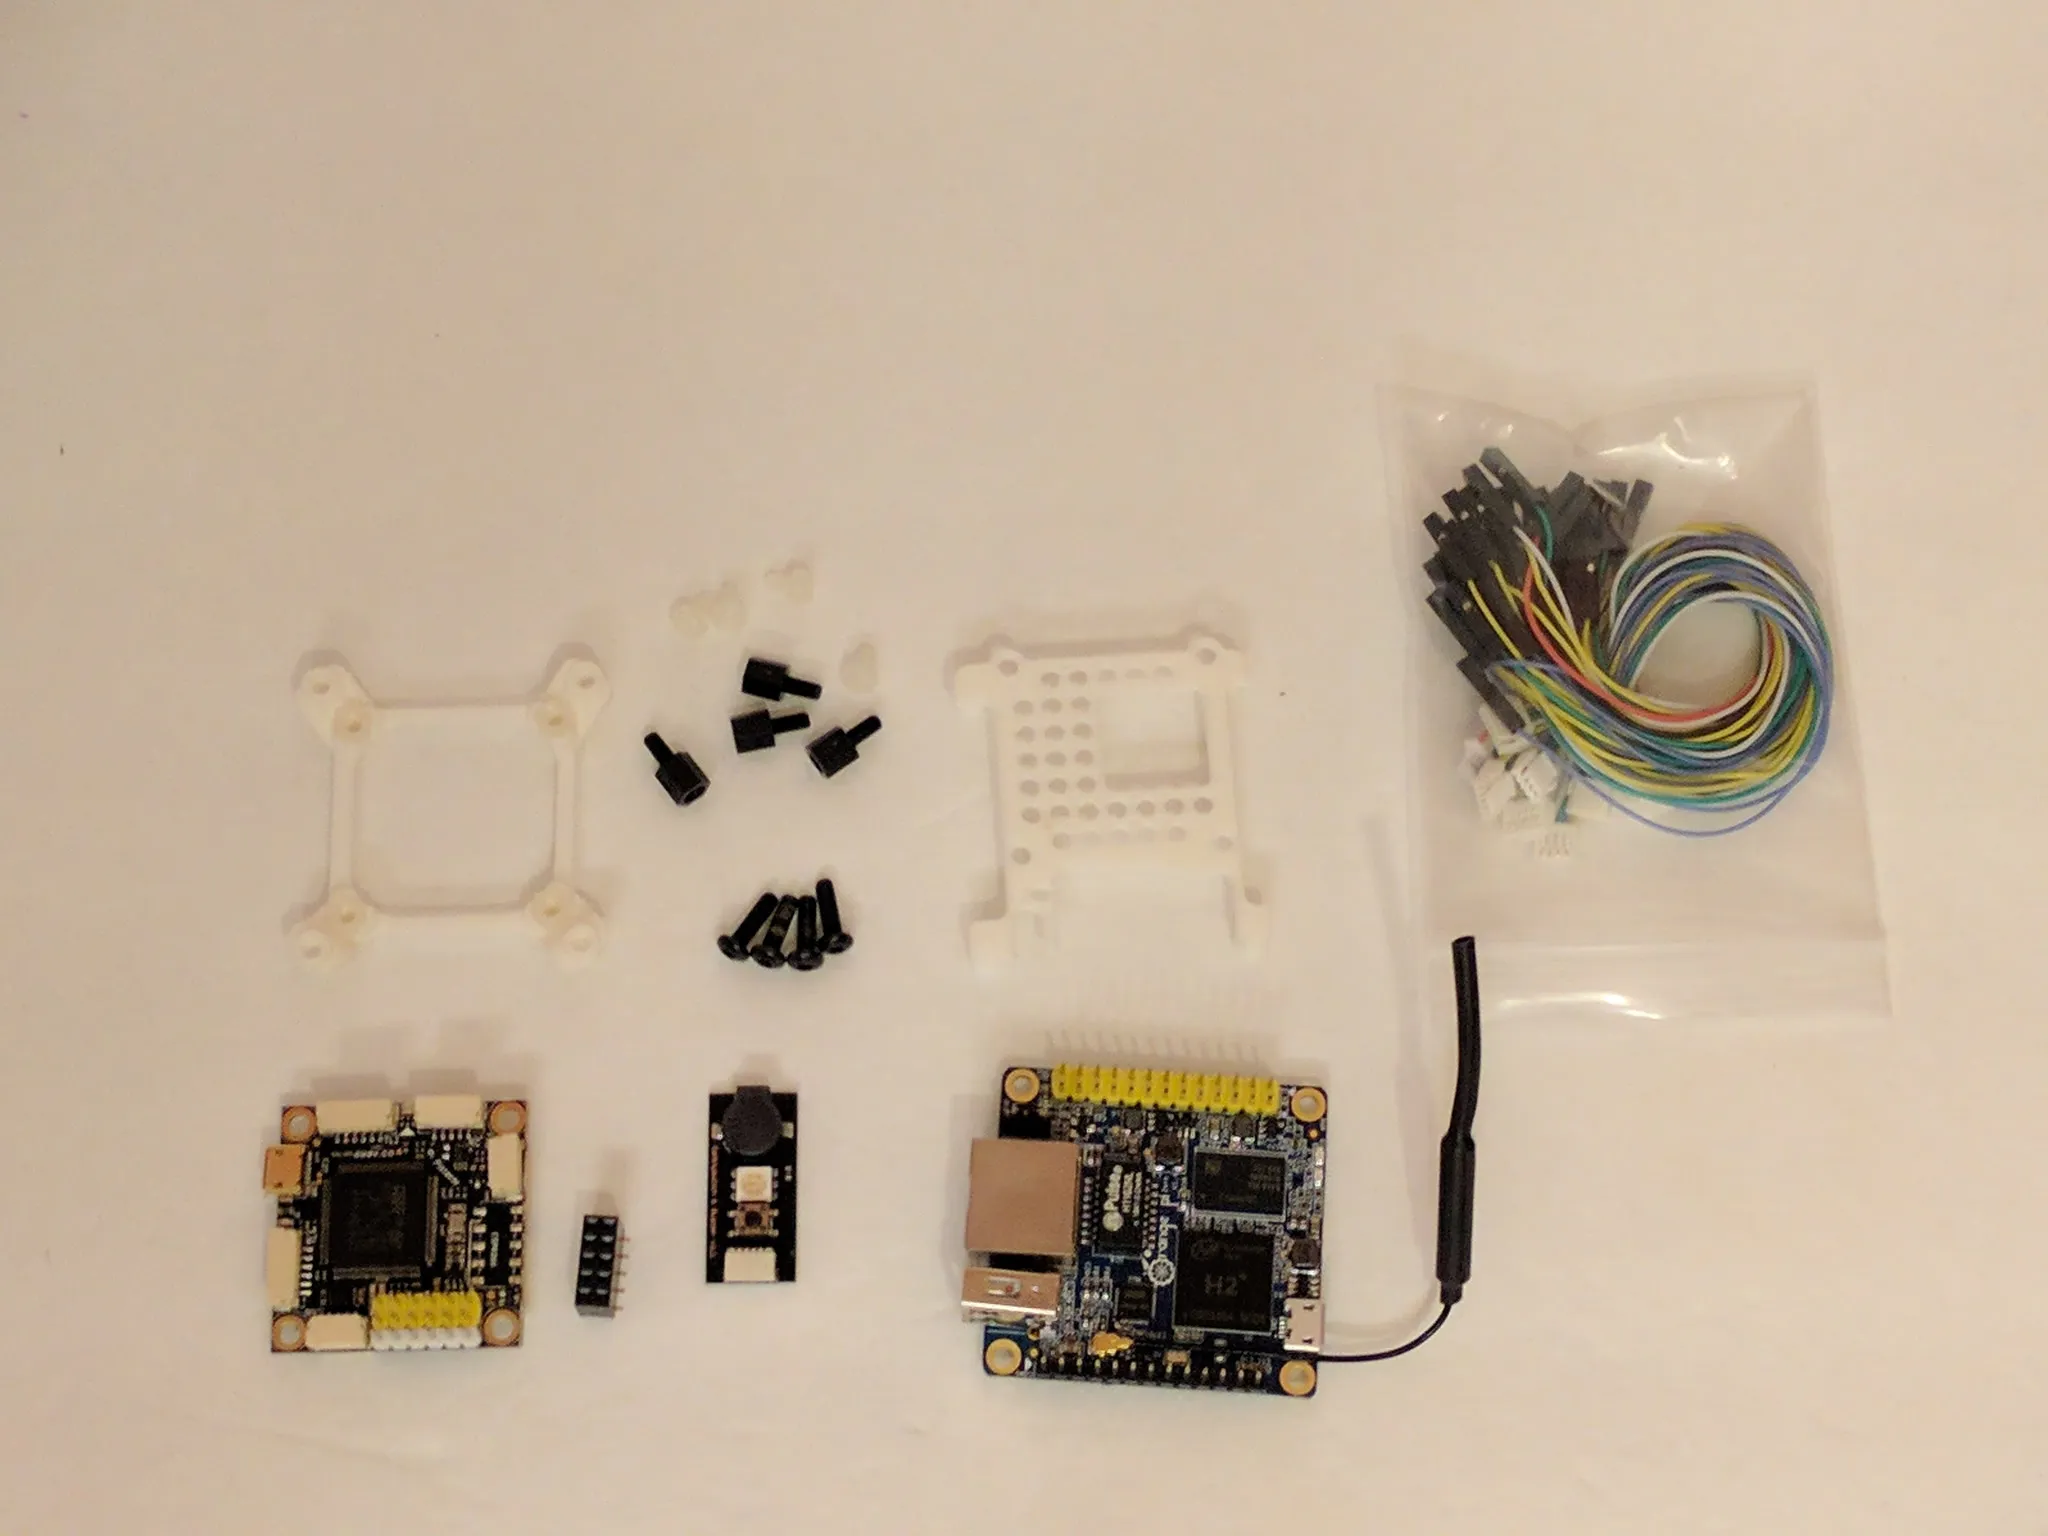
catkin_buildHardware Setup
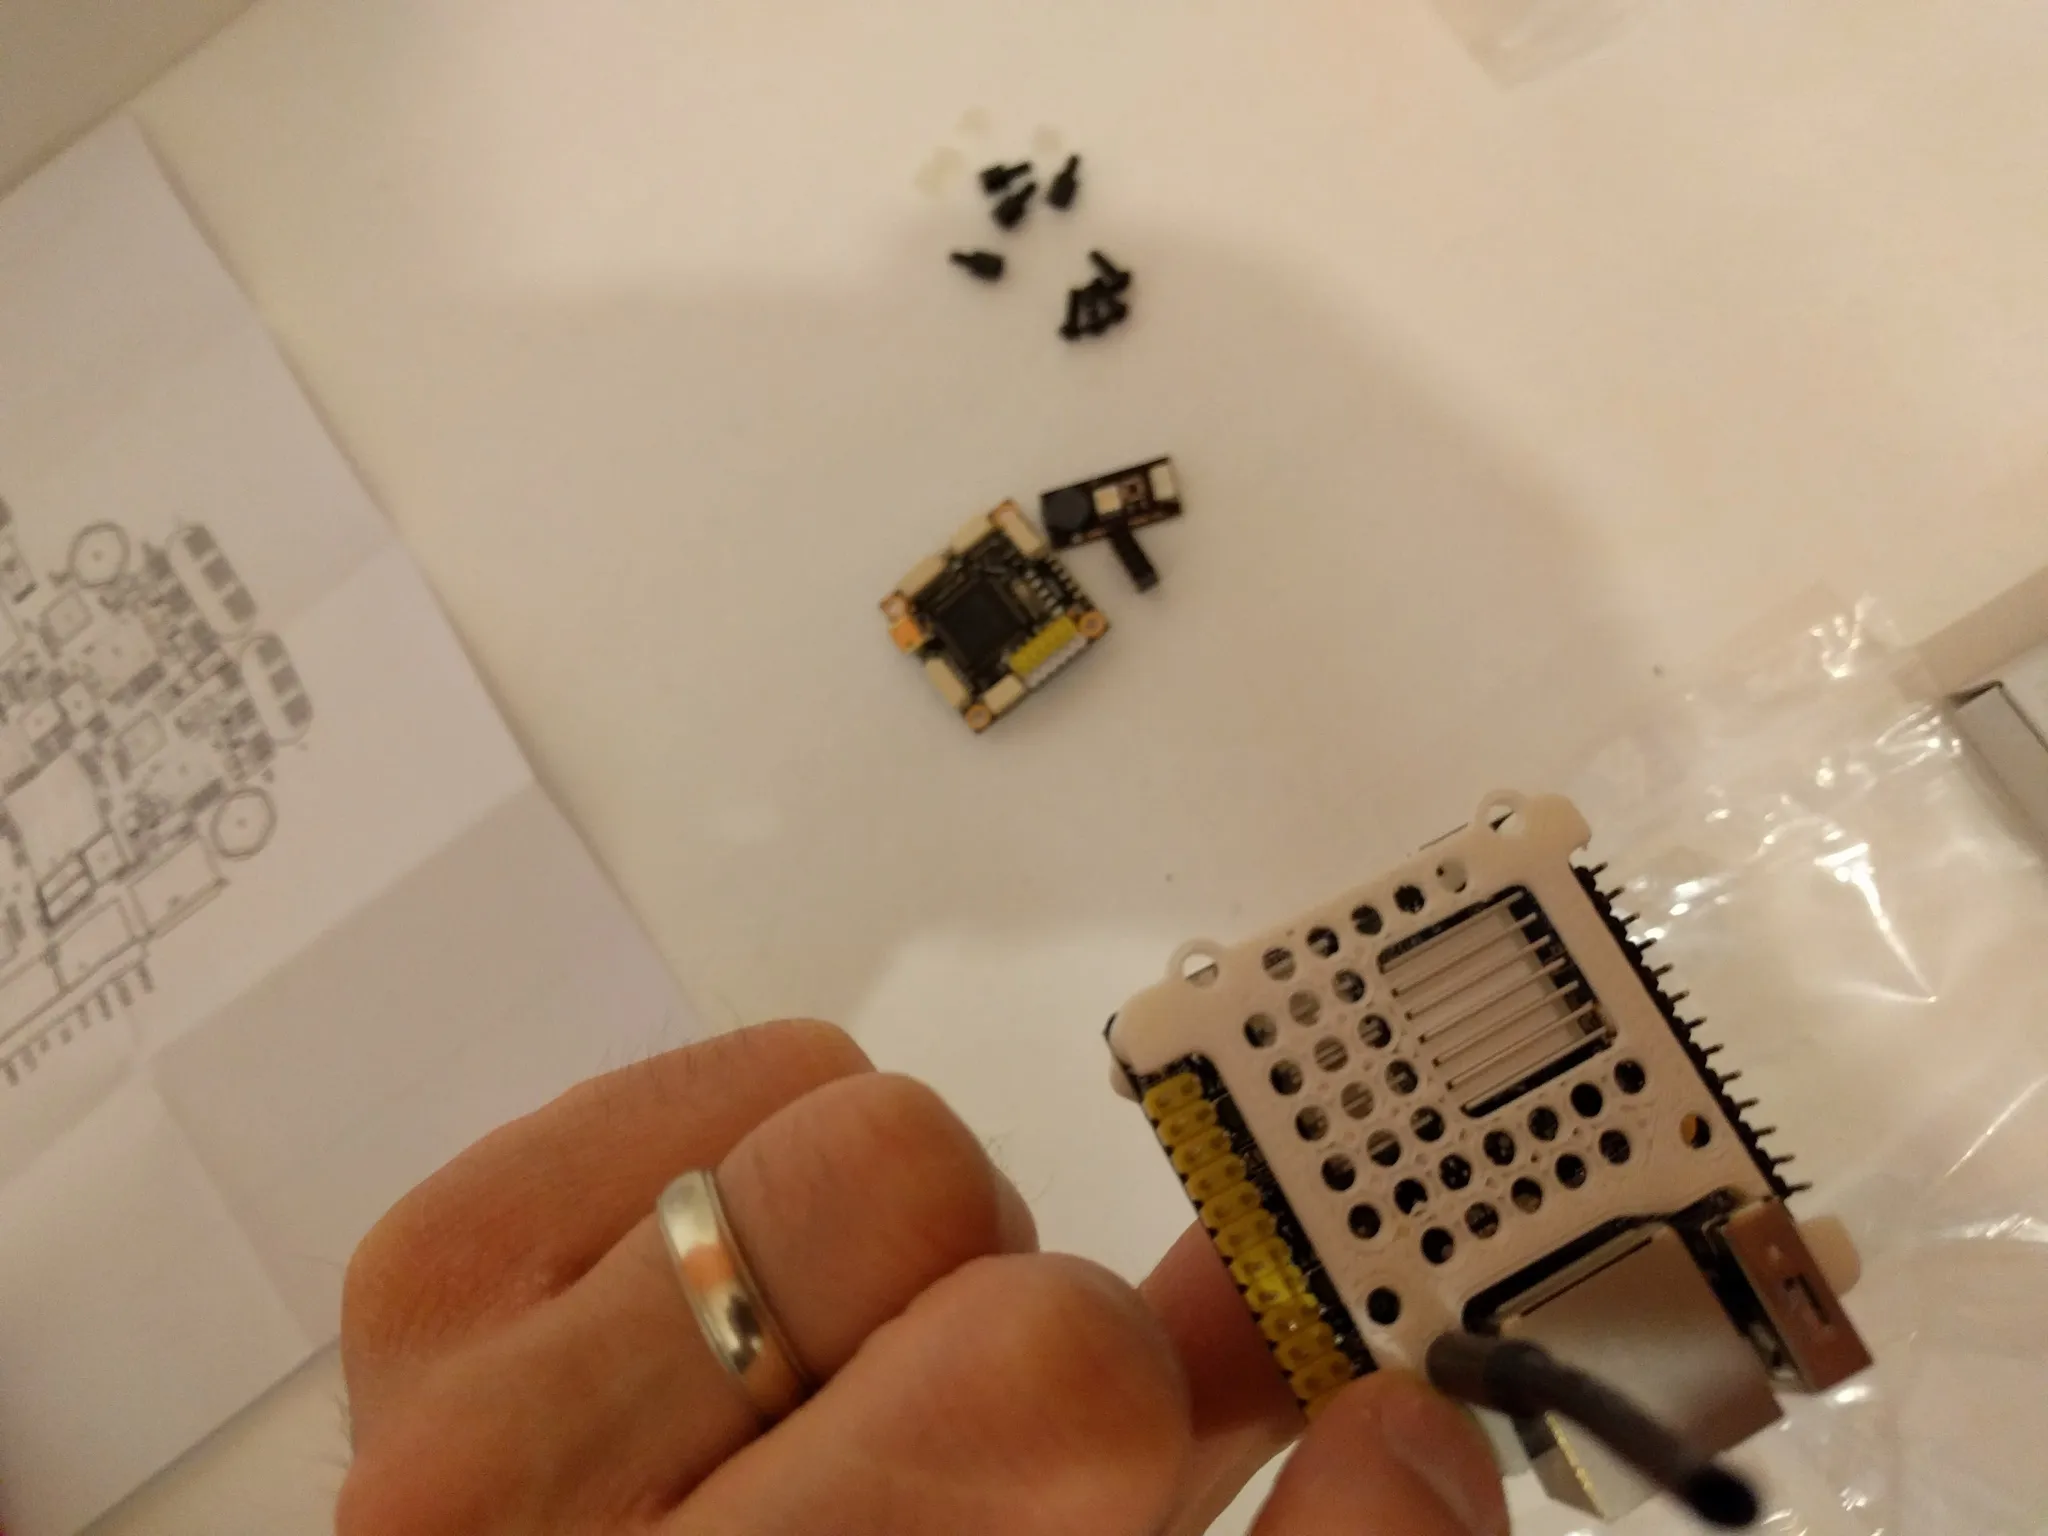
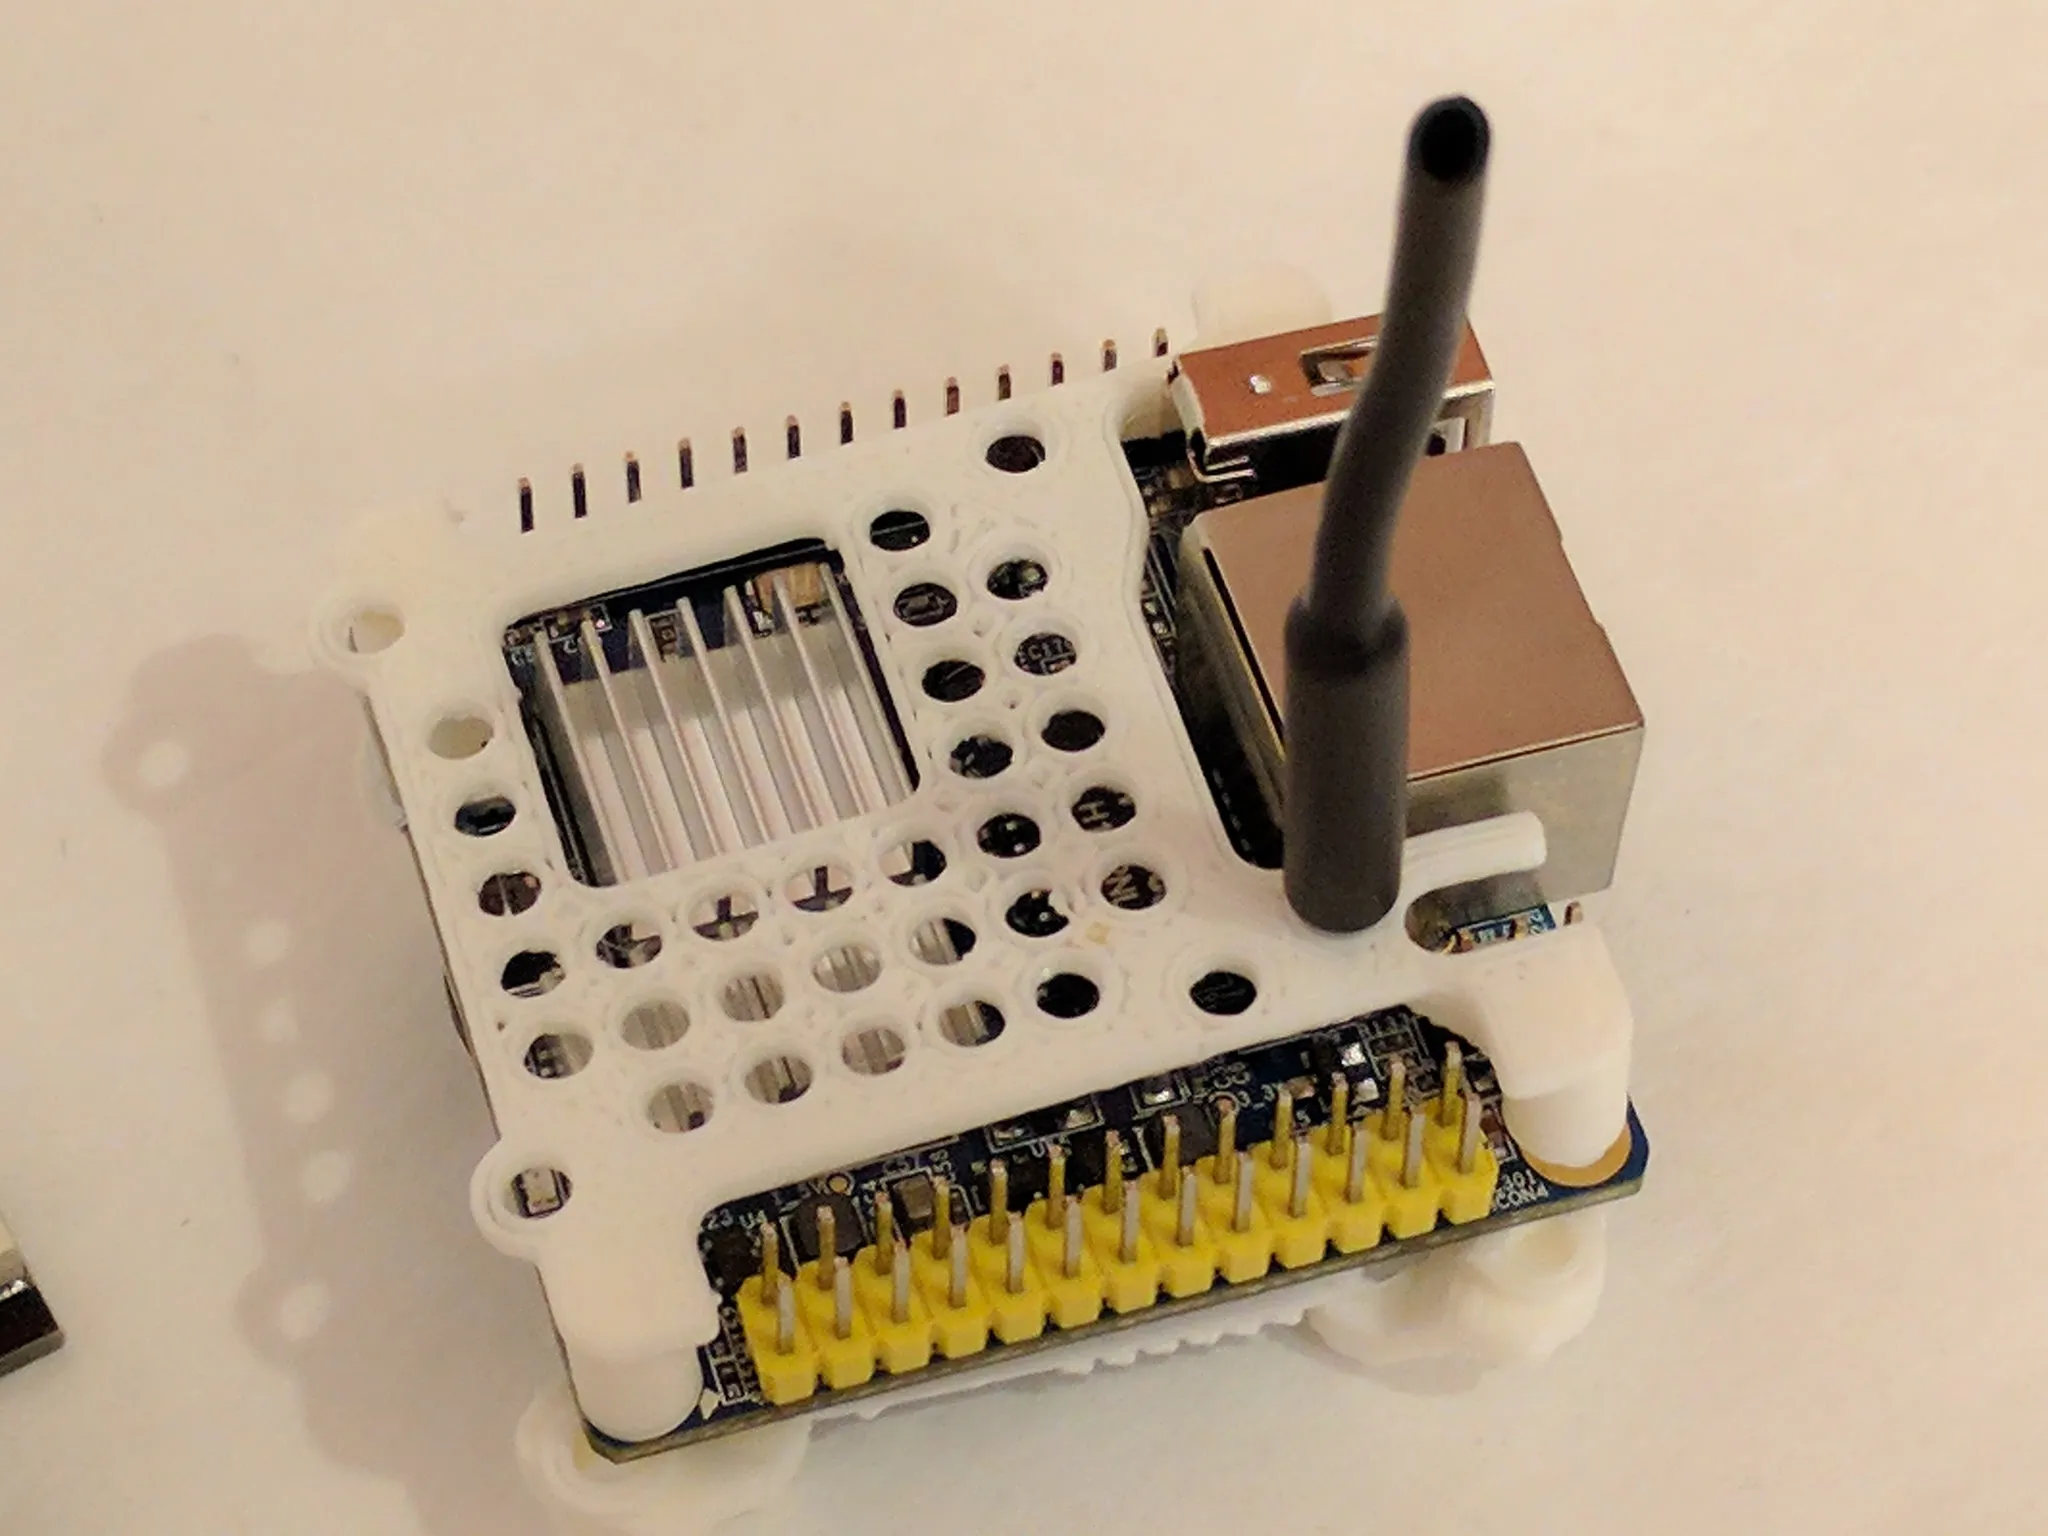
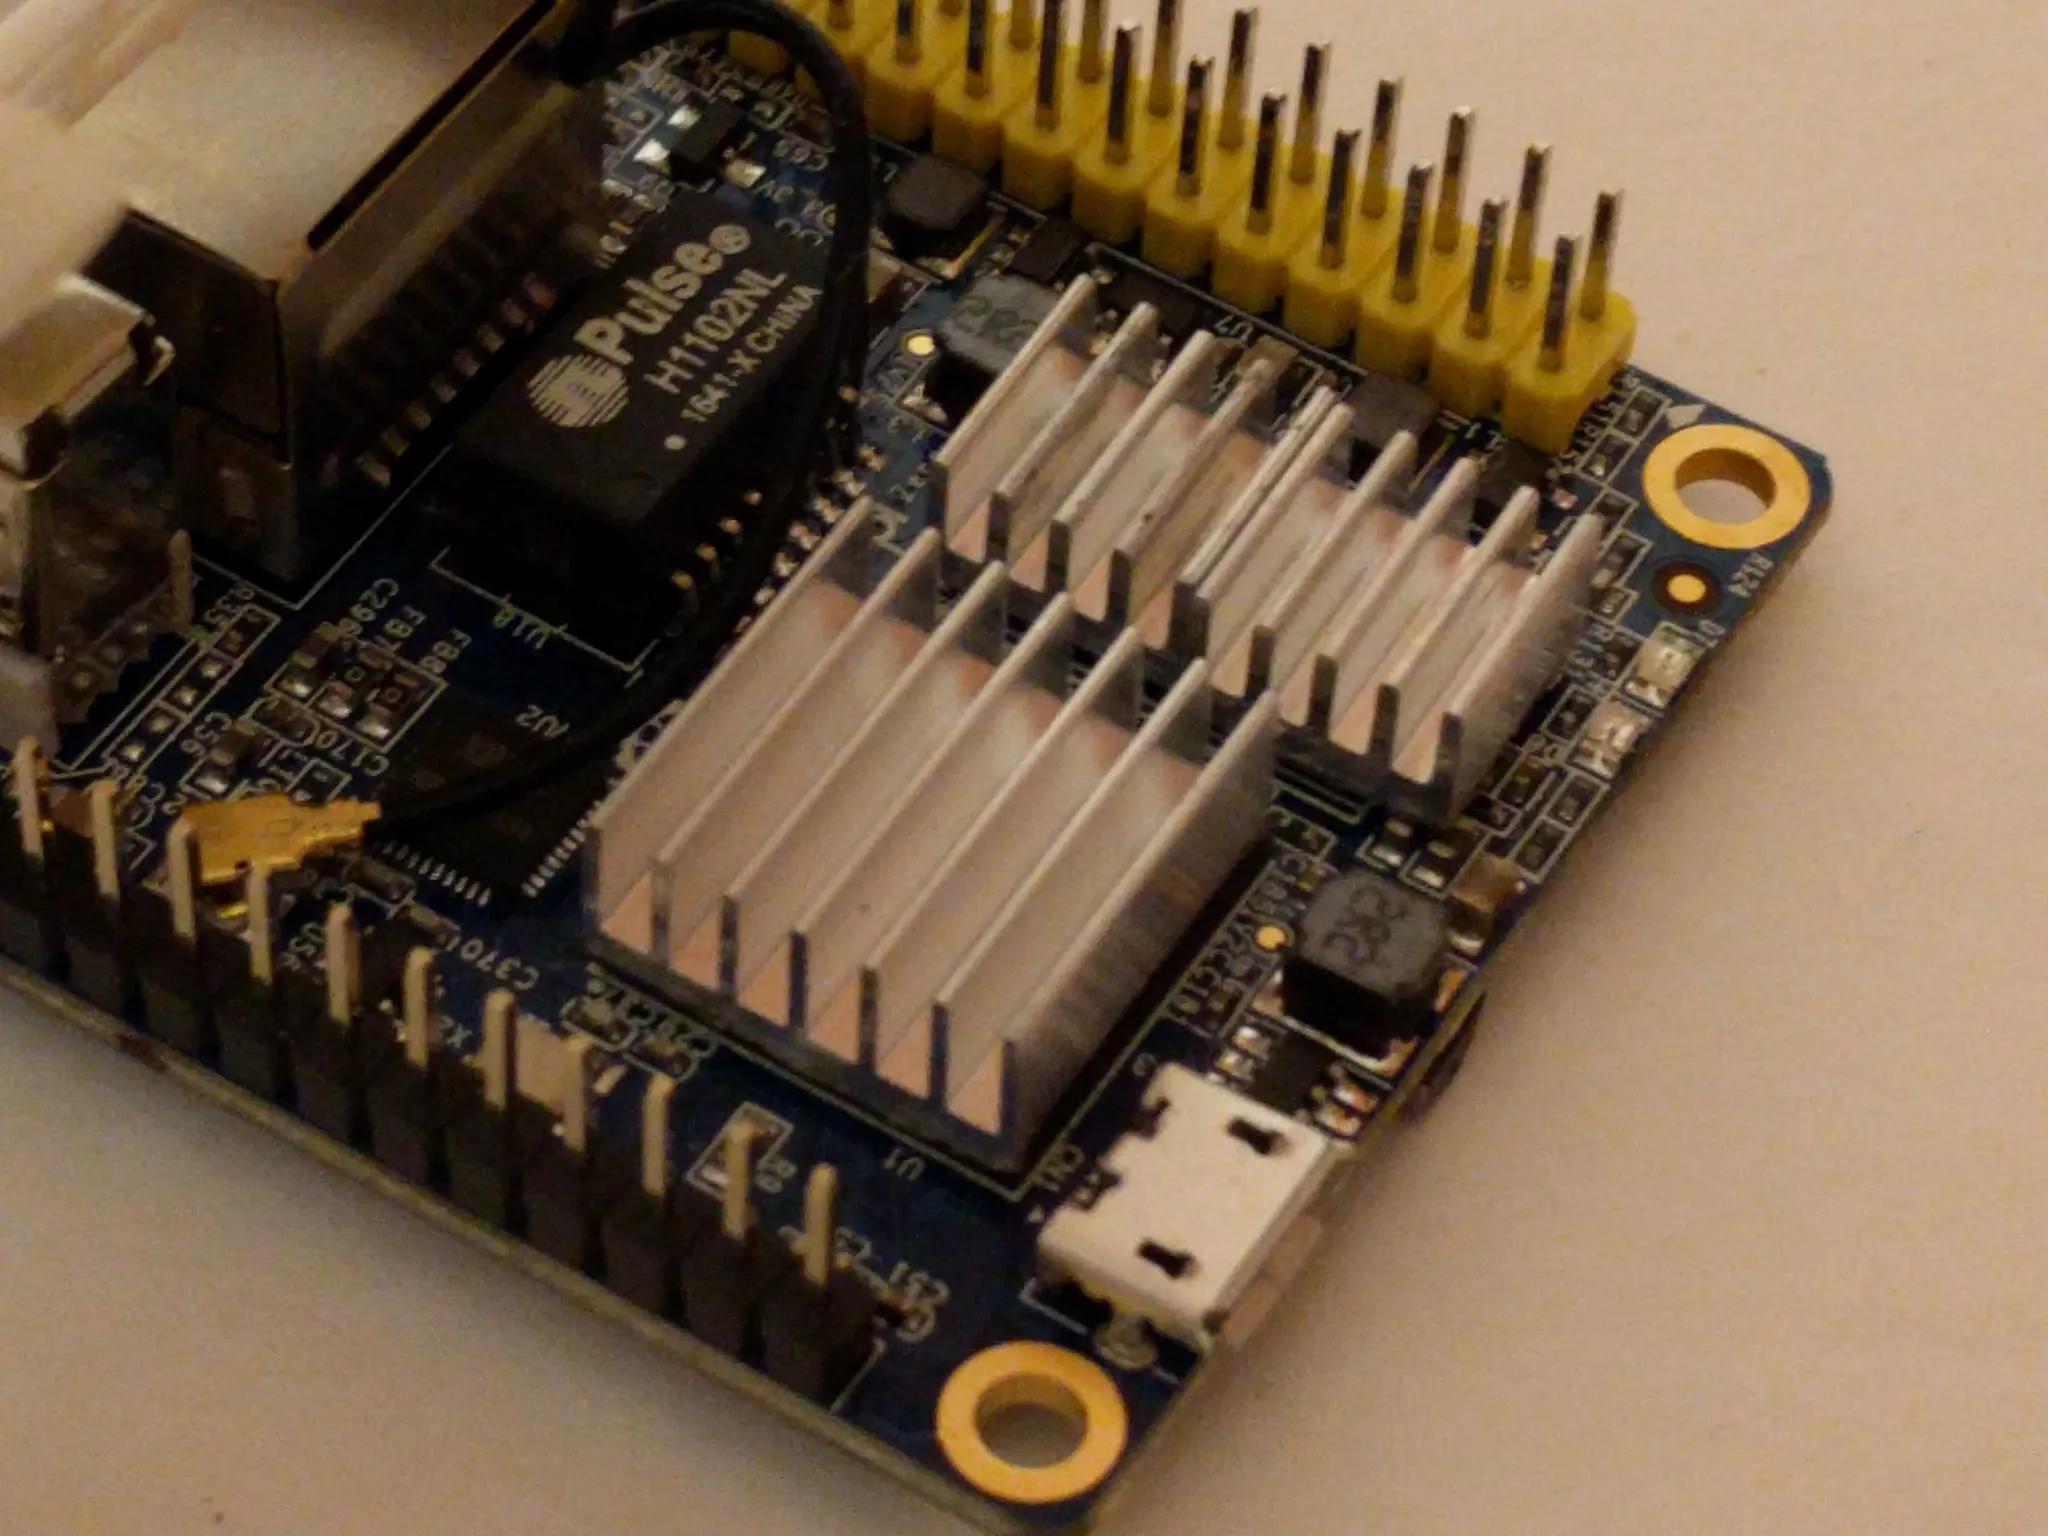
The plan is to use an Orange Pi Zero and Pixracer.
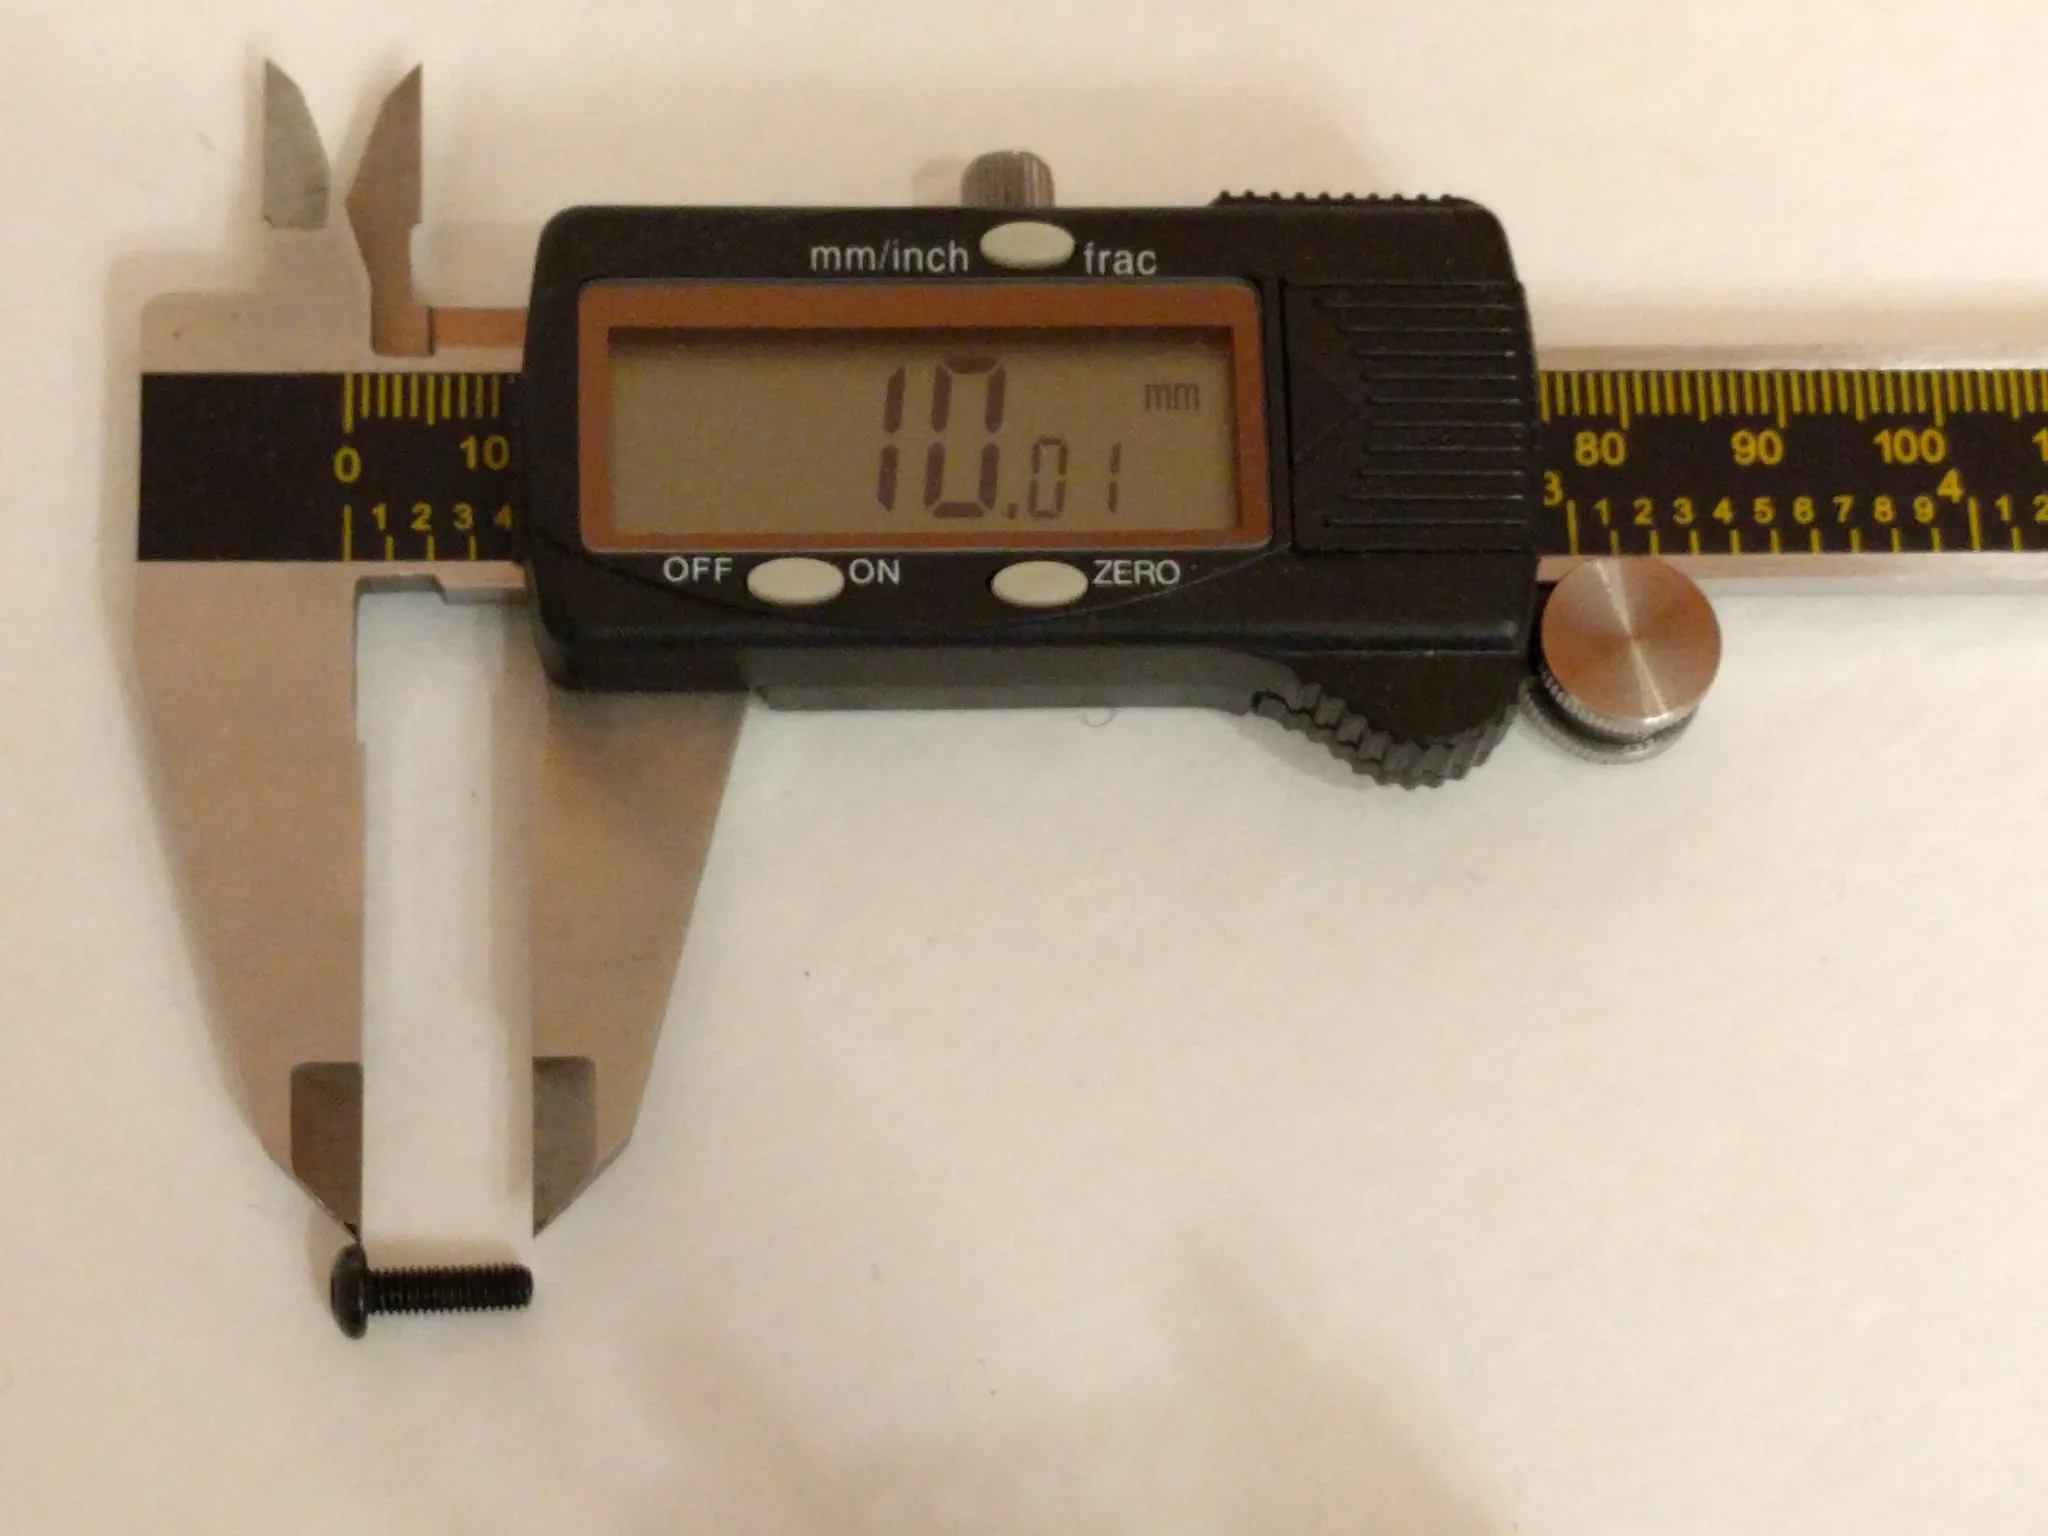
The mount to connect the two is on Thingiverse. Here’s how to assemble it.